Avoid the Wrong Drywall Compound: $800 Mistake
Drywall finishing might look simple, but using the wrong compound can turn an affordable project into an expensive problem. Whether you repair a few seams or finish an entire room, understanding which drywall compound to use, how to apply it correctly, and when to call in a professional makes the difference between a smooth finish and a costly redo.
Many homeowners lose hundreds of dollars in wasted material, sanding labor, or repainting because the wrong compound was used for the wrong purpose. This guide explains how to avoid that mistake by breaking down the different types of drywall compounds, what each is designed to do, how much projects typically cost, and how to make smart hiring or DIY decisions.
Project Cost Breakdown
Average Cost Ranges
- Basic patch or small repair: $150 to $350
- Standard room finishing: $800 to $1,800
- Full home or multi-room project: $2,500 to $6,000
What Is Included
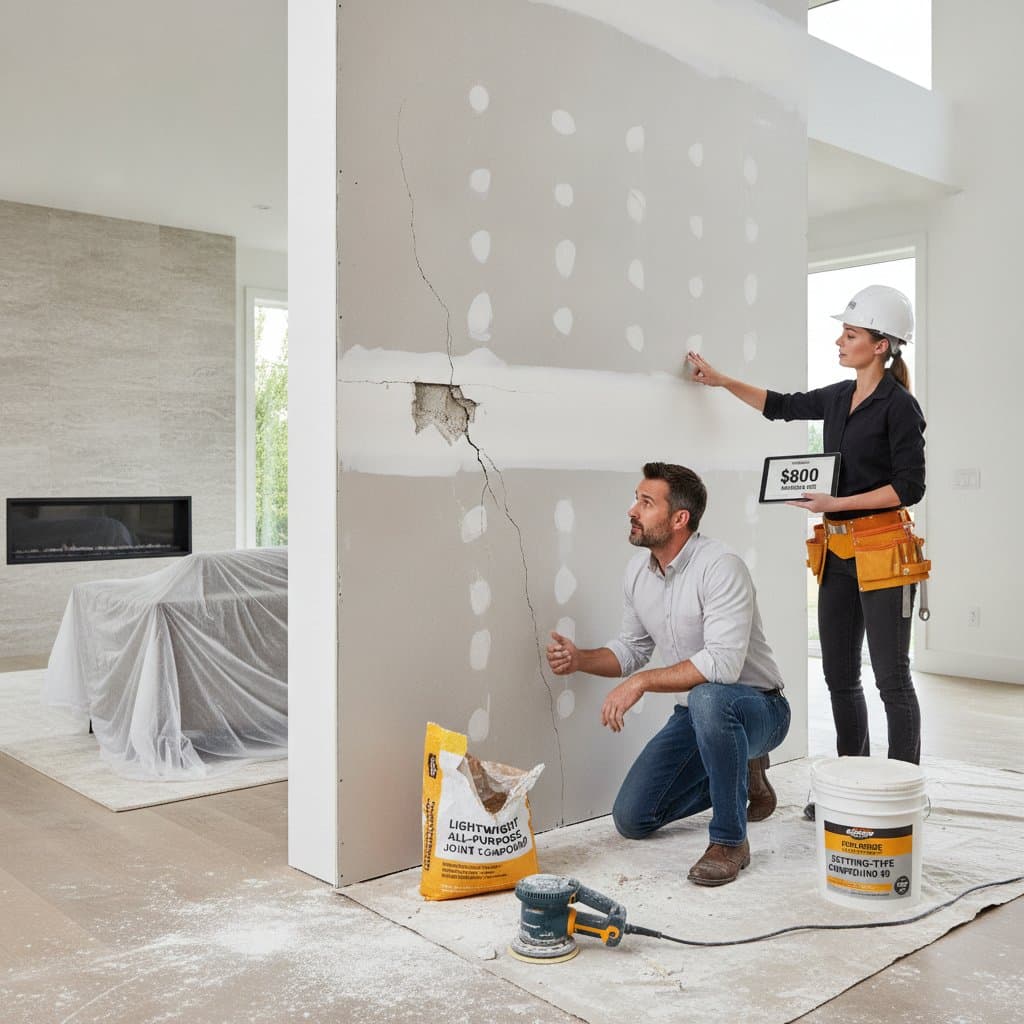
Joint compound materials appear in all-purpose, lightweight, or setting-type forms. Labor covers taping, mudding, and sanding. Corner bead installation and surface preparation complete the basic scope.
What Costs Extra
Moisture-resistant or specialty drywall adds expense. Skim coating for perfectly smooth walls, repainting after repair, and structural repairs behind damaged drywall also increase the total.
Factors That Affect Final Cost
| Factor | Cost Impact | Examples |
|---|---|---|
| Type of compound | Moderate | Using a fast-setting compound requires more skill but less drying time |
| Room condition | High | Cracks, uneven seams, or moisture damage increase prep time |
| Finish level desired | High | Level 5 smooth finishes require multiple coats and sanding |
| Labor rate | Moderate | Professional rates differ by region and experience level |
| DIY versus professional | Variable | DIY saves labor cost but risks material waste and uneven results |
Understanding Drywall Compounds
Drywall compound, often called joint compound or mud, fills seams, embeds tape, and creates a smooth surface before painting. The mistake most people make is assuming all compounds are interchangeable. Each type has a specific purpose, drying time, and texture.
All-Purpose Joint Compound
This is the most common material for general drywall finishing. It is pre-mixed, easy to spread, and dries relatively slowly, giving beginners time to work with it. It works best for embedding tape and applying first coats.
Pros include forgiving application, smooth texture, and easy sanding. Cons include long drying time and a tendency to crack in thick layers.
Lightweight All-Purpose Compound
This version is pre-mixed but lighter and easier to sand. It is often used for final coats and touch-ups. Many DIYers mistakenly use it for taping seams, which can lead to cracking later.
Pros include a smooth finish, easy sanding, and less shrinkage. Cons include weaker bonding and unsuitability for initial coats.
Setting-Type Compound
Also called hot mud, this compound comes in powder form and hardens through a chemical reaction rather than air drying. It suits patching or multiple coats applied in a single day. The challenge is timing because it sets quickly, so mistakes must be corrected fast.
Pros include fast setting, a strong bond, and minimal shrinkage. Cons include harder sanding, required mixing skill, and short working time.
Topping Compound
This is used for the final coat to achieve a perfectly smooth surface. It is not suitable for taping or filling deep seams. Using it incorrectly can lead to seams reappearing under paint months later.
Pros include excellent finish quality and smooth application. Cons include weak adhesion and unsuitability for base coats.
Choosing the wrong product can require sanding and re-mudding entire sections, which often costs up to $800 in wasted time and materials.
Process and Timeline Expectations
A typical drywall finishing project moves through several phases. Preparation includes surface cleaning, securing drywall sheets, and checking for gaps or protruding screws. Taping and the first coat follow with all-purpose compound to cover seams and corners.
Second and third coats build layers with lightweight or topping compound for smoothness. Sanding and inspection remove imperfections before priming or painting. Final touches apply primer and check under bright light.
A small repair can finish within a day, while a full room may take several days due to drying time and sanding. Setting-type compounds can speed up work, but they demand experience.
DIY versus Professional Guidance
When DIY Makes Sense
Minor wall dents or small patch repairs work well for DIY. Cosmetic touch-ups before painting also suit homeowners. Pre-mixed lightweight compound handles small areas effectively.
When to Hire a Professional
Entire room finishing or remodel projects benefit from professional skill. Moisture or structural damage repair requires expertise. Smooth wall finishes, complex corners, and projects that need setting-type compounds for speed and strength belong with trained crews.
How to Choose the Right Contractor or Handyman
Research and Verification
Start by checking licenses, insurance, and references. Look for professionals who specialize in drywall and surface preparation. A general handyman may handle small repairs, but large finishing jobs are best left to drywall specialists.
Comparing Quotes
Request at least three detailed estimates. Each should outline material types, number of coats, sanding steps, and cleanup. Avoid quotes that skip these details, as they often lead to hidden costs.
Communication and Expectations
Before work begins, discuss the desired finish level. Walls can range from Level 1 basic coverage to Level 5 smooth and paint-ready. Clear communication about expectations helps prevent disputes later.
Quality Checks
Inspect each stage before the next begins. Look for even seams, consistent texture, and no visible tape. A good contractor welcomes homeowner walkthroughs and corrections before moving forward.
Planning Your Project
Measure the area accurately and gather the correct compound types before starting. Schedule work during stable temperature and humidity conditions. Prepare tools and safety equipment in advance to maintain steady progress.
Frequently Asked Questions
What factors affect the cost of drywall finishing?
Costs depend on compound type, finish level, labor rates, and wall condition. For example, a smooth Level 5 finish can double the price of a basic taped wall. Repairs involving moisture or cracks may add more due to extra prep work.
How long does drywall compound take to dry?
Pre-mixed compounds usually need about a day between coats. Setting-type compounds harden within minutes or hours, depending on the formula. Always allow full drying before sanding or recoating to prevent cracks.
Should homeowners try to finish drywall themselves?
DIY works for small patches or simple repairs, but large walls and ceilings require skill and patience. Uneven sanding or improper taping can lead to visible seams after painting. Hiring a professional ensures better results and saves time.
How can I tell if my contractor is using the right compound?
Ask what type they plan to use for each stage. All-purpose should be used first, lightweight or topping for final coats, and setting-type for fast repairs. A professional will explain their choice and provide manufacturer details.
What preparation should be done before applying compound?
Surfaces should be clean, dry, and free from dust. Screws must be slightly recessed, and joints should be properly taped. Temperature and humidity should be stable to promote even drying.
What are common mistakes that lead to extra costs?
Using lightweight compound for taping, skipping sanding between coats, or painting too soon are frequent issues. These mistakes can cause cracking, bubbling, or uneven paint absorption that might cost up to $800 to fix. Careful selection, patience, and proper process prevent these problems.
Executing Your Drywall Project Successfully
Select the compound that matches each stage of work. Follow the sequence of preparation, taping, coating, sanding, and inspection. Verify results at every step to achieve durable, paint-ready walls without unexpected expenses.