Micro-Cement Walls: The Modern Alternative to Drywall in 2026 Homes
Homeowners seeking innovative updates beyond conventional drywall increasingly select micro-cement walls. This advanced coating, previously limited to luxury designs, now serves as a reliable solution for residential and commercial environments. Micro-cement yields a uniform surface that withstands moisture, supports personalized styles, and avoids the upkeep challenges of standard drywall. A clear grasp of expenses, application techniques, and sustained advantages assists in determining if micro-cement suits upcoming projects.
Understanding Micro-Cement Walls
Micro-cement consists of a polymer-enhanced cement overlay applied atop substrates like plaster, concrete, tile, or drywall. It produces an unbroken, seamless layer that emulates concrete, stone, or refined stucco. The outcome delivers a contemporary, understated appearance combining robust construction with adaptable aesthetics. Tinting options span virtually all hues, while sealers provide matte or satin effects, and textures introduce gentle patterns.
In contrast to drywall, which depends on seams, joints, and subsequent painting, micro-cement establishes a unified veneer just millimeters in depth. This approach appeals to those desiring masonry-like visuals without added mass or extended setup periods.
Detailed Cost Analysis
Typical Price Ranges
- Basic applications: $8 to $12 per square foot
- Standard applications: $13 to $20 per square foot
- Premium applications: $21 to $35 per square foot
Core Components Included
- Thorough surface cleaning and preparation
- Bonding primer and initial base coat
- Two to three micro-cement finish layers
- Application of protective sealer
- Necessary sanding and polishing
Additional Expenses
- Pre-coating wall repairs ($1 to $3 per square foot)
- Bespoke pigment mixing ($100 to $300 per room)
- Unique textures or accents ($2 to $5 per square foot)
- Enhanced moisture barriers for wet areas ($1 to $2 per square foot)
Influences on Total Expenses
| Factor | Impact Level | Specific Examples |
|---|---|---|
| Surface Quality | Moderate | Patching cracked drywall demands extra priming |
| Design Details | High | Layered color fades or patterned motifs |
| Area Dimensions | Moderate | Compact spaces elevate per-square-foot rates due to preparation overhead |
| Sealer Options | Moderate | Polyurethane variants exceed acrylic costs |
| Installer Skill | High | Expert labor ensures flawless results at a premium |
Micro-cement demands higher initial investment than drywall finishing, yet it curtails future expenses. The sealed exterior repels moisture, stains, and impacts, minimizing the need for repairs or refreshes.
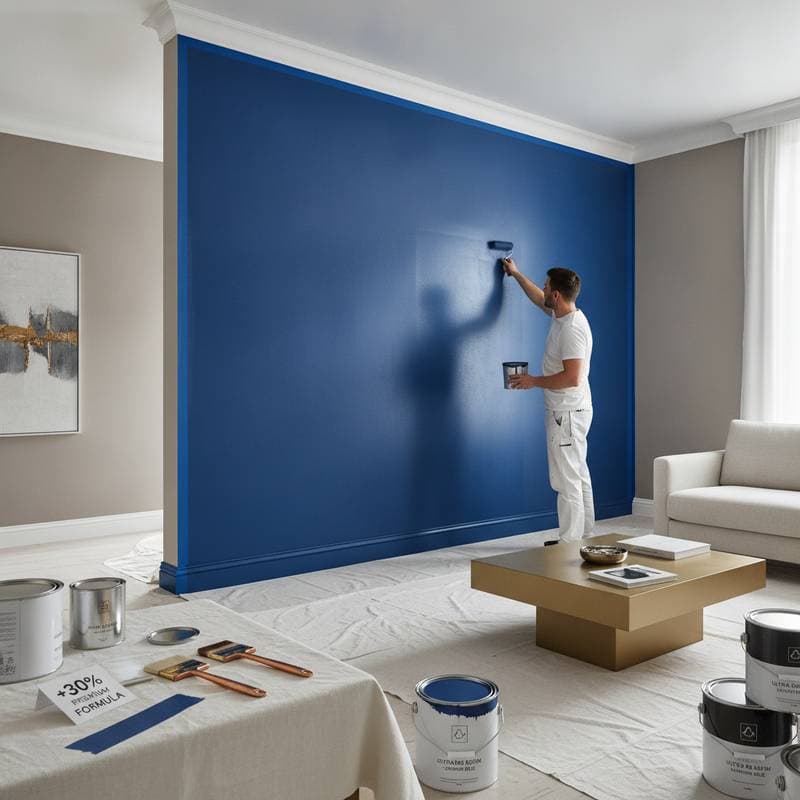
Step-by-Step Installation Guide
Applying micro-cement demands accuracy and deliberate pacing. The method proves swifter than traditional plastering, though it necessitates meticulous groundwork and progressive layering.
1. Preparing the Surface
Current drywall or plaster requires cleaning to remove dust, oils, or instability. Fillers address cracks and voids, followed by a bonding primer for secure attachment. This foundation prevents subsequent fissures by ensuring a stable substrate.
2. Applying the Base Coat
Spread a slim cement blend uniformly with a trowel to form the groundwork. It corrects slight irregularities and supports overlying layers. Drying occurs in hours, influenced by ambient humidity and warmth.
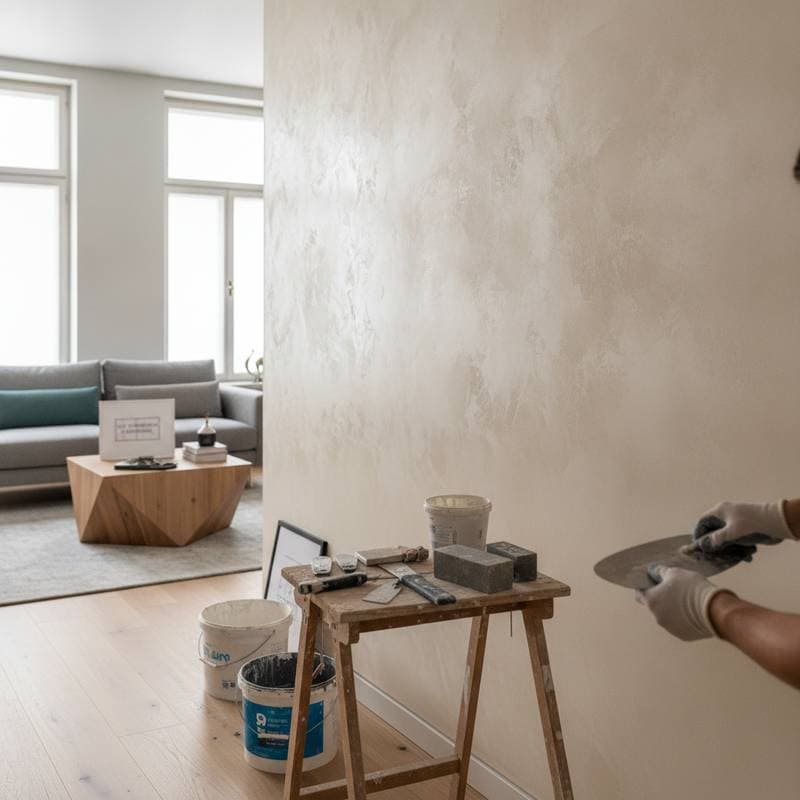
3. Adding Finish Layers
Apply two or more finishing coats to define texture and shade. Professionals employ smooth, flowing strokes for natural variations akin to honed stone or concrete. Allow complete drying between applications to achieve uniformity.
4. Sealing for Protection
After curing the top layer, coat with a durable sealer to shield from liquids, marks, and abrasions. Select matte, satin, or gloss based on aesthetic preferences; the sealer enhances depth and resilience.
5. Refining the Finish
Sand and buff lightly to eliminate minor flaws. The completed surface appears fluid, cohesive, and compelling.
Project Timeline Overview
Expect three to five days for a routine micro-cement endeavor, accounting for preparation and curing intervals. Environmental factors like moisture or heat may adjust durations. For expansive areas or intricate patterns, timelines extend marginally. Micro-cement streamlines the workflow compared to drywall's multi-stage taping, filling, sanding, and painting.
Micro-Cement Versus Drywall: Key Comparisons
Strength and Longevity
Drywall sustains dents, scratches, and seam failures readily. Micro-cement creates a resilient shell that endures blows and humidity, suiting busy zones, culinary spaces, and lavatories.
Upkeep Requirements
Drywall painted surfaces demand frequent touch-ups and cautious cleaning. Micro-cement cleans easily with mild detergent and water. Sealing inhibits mold and fungal development effectively.
Design Versatility
Drywall serves as a neutral base for paints or coverings, whereas micro-cement imparts inherent texture and form. It adapts to any color scheme and harmonizes with sleek or traditional decors.
Expense Evaluation
Drywall setup, including completion and coating, averages $3 to $5 per square foot. Micro-cement spans $8 to $20 typically, justified by superior components and craftsmanship. Longevity and low care often balance the premium over years.
Professional Installation Versus DIY Efforts
Micro-cement challenges novices due to its rapid setting and precision needs. Seasoned hobbyists may manage minor fixes, but comprehensive coverage warrants certified experts. Even application and optimal curing avert seams or fractures; climate control proves essential.
Scenarios for Professional Involvement
- Extensive surfaces or full-room treatments
- Humid locations like baths or galleys
- Tailored hues or patterns
- Repairs to underlying structures
Feasible DIY Applications
- Compact feature walls or insets
- Trials on inconsequential areas
- Refreshing prior micro-cement layers
Professionals guarantee uniform depth, adequate prep, and impeccable outcomes, often with guarantees against bonding or coating failures.
Selecting a Competent Installer
The choice of applicator shapes project quality profoundly. Prioritize specialists in ornamental plasters or micro-cement systems.
Essential Verification Steps
- Project History: Inquire about completed micro-cement installations.
- Credentials: Verify licenses and insurance for liability and workers.
- Work Samples: Review images of past transformations.
- Client Feedback: Speak with references on reliability, tidiness, and execution.
- Supply Reliability: Confirm use of validated micro-cement from reputable sources.
Detailed proposals should specify phases, coat counts, and protection techniques. Shun ambiguous or bundled pricing without specifics.
Preparing Your Space for Installation
Homeowners facilitate progress through proactive measures.
- Relocate furnishings and decor from the site.
- Maintain steady room temperatures to aid curing.
- Review sealer finishes and hue prototypes in advance.
- Anticipate restricted access during drying periods.
- Arrange airflow for any solvent-containing sealers.
Such actions enable installers to work efficiently and achieve reliable standards.
Ongoing Maintenance and Care
Micro-cement endures with minimal intervention. Clean routinely using a soft cloth and neutral soap solution; avoid abrasives that might dull the sealer. Inspect annually for wear, reapplying sealer every three to five years in high-use areas to sustain protection. Address spills promptly to prevent penetration, ensuring the surface remains vibrant and intact for decades.
Strategizing Your Micro-Cement Project
Begin by assessing room needs and budget constraints. Consult multiple contractors for tailored quotes, and gather material samples to visualize integration with existing elements. Schedule during off-peak seasons to secure better rates and timelines. Factor in complementary updates, such as flooring or fixtures, to maximize the renovation's impact.
Common Questions About Micro-Cement Walls
What Determines Installation Costs?
Surface readiness, existing damage, customization levels, and specialist rates primarily drive expenses. Pristine bases align with budget minima, while repairs or elaborate effects increase totals. Advanced sealers or pigments contribute further to the overall figure.
How Long Does Installation Last?
Standard efforts conclude in three to five days, varying with scale and atmospheric conditions. Phases encompass prep, coating, drying, and finalizing, each under controlled settings for optimal adhesion.
Is DIY Application Advisable?
Professionals handle most cases effectively, given the material's sensitivity to evenness and timing. Experts possess specialized equipment to sidestep cracks or inconsistencies. Limit DIY to minor accents rather than primary surfaces.
How to Identify a Skilled Contractor?
Solicit portfolios and endorsements from prospects. Seek manufacturer endorsements and insurance proofs. Obtain three itemized bids detailing supplies, applications, and protections. Clear dialogue and proven track records signal trustworthiness.
What Occurs During Installation?
Initial prep involves dust and activity, succeeded by calm curing intervals. Secure zones stay inaccessible until completion. Contractors safeguard surroundings against overspray. Post-cure, walls prove accessible and robust.
What Issues Arise and How Are They Resolved?
Micro-fissures stem from inadequate bases or dampness; thorough priming and sealing mitigate risks. Patches and resealing correct minor flaws without full replacement. Vigilant checks and soft maintenance extend service life significantly.
Realizing Lasting Value with Micro-Cement
Opting for micro-cement elevates home aesthetics while fortifying against everyday demands. Its integration promises not only visual sophistication but also practical efficiencies that endure. Homeowners who invest thoughtfully reap rewards in style and simplicity for years ahead.