The $800 Mistake Every DIY Painter Makes on Corners
Corners appear straightforward until the painting begins. Homeowners often select a brush or roller, expecting an easy task. However, once the paint dries and light illuminates the walls, imperfections become evident. The most significant issues arise at corners, where drywall taping, mudding, and painting intersect. A single error can affect the entire room, resulting in repairs that cost eight hundred dollars or more.
Knowledge of why corners pose difficulties, methods to prevent expensive errors, and signs to hire a professional can conserve time, reduce frustration, and control expenses.
Why Corners Challenge Even Skilled DIY Painters
Corners represent structural transitions between two surfaces that expand, contract, and reflect light in distinct ways. Flat walls may conceal minor flaws, but corners amplify them under scrutiny.
Typical issues encompass:
- Cracked or bubbling tape lines
- Uneven drywall mud buildup
- Visible seams beneath paint
- Misaligned corner beads
- Paint bleeding or peeling along edges
These problems originate prior to paint application. An inadequately taped or sanded corner will not achieve a flawless appearance, regardless of the number of paint coats.
The Real Cost of a Corner Mistake
The eight-hundred-dollar expense stems from the comprehensive repair procedure. Correcting a flawed corner involves removing the damaged area, installing new drywall tape and compound, sanding once more, priming, and repainting. Labor, materials, and preparatory work accumulate rapidly.
Typical Repair Breakdown
- Drywall corner repair: $200 to $350
- Surface retexturing and priming: $100 to $250
- Repainting and cleanup: $150 to $300
- Touch-ups and detailing: $50 to $100
Professional intervention for such repairs frequently exceeds eight hundred dollars, particularly with multiple corners affected. An intended weekend endeavor transforms into days of inconvenience and unforeseen costs.
Project Cost Breakdown
Average Cost Ranges
- Basic corner repair: $150 - $300
- Standard drywall corner reconstruction: $400 - $800
- Full-room corner restoration and paint blending: $800 - $1,200
What's Included
- Removal of damaged tape or bead
- Application of new compound and sanding
- Priming for uniform finish
- Painting and blending for consistent color
- Final inspection for alignment and smoothness
What Costs Extra
- Wall texture matching or pattern replication
- Moisture or crack repairs behind drywall
- Repainting adjoining walls for color continuity
- Upgraded materials such as metal corner beads or high-durability paint
Factors That Affect Final Cost
| Factor | Cost Impact | Examples |
|---|---|---|
| Wall height | Higher | Cathedral ceilings or stairwell corners |
| Material choice | Moderate | Metal vs. paper corner bead |
| Paint type | Moderate | High-quality enamel or washable finishes |
| Surface prep | High | Cracked or uneven drywall requiring rework |
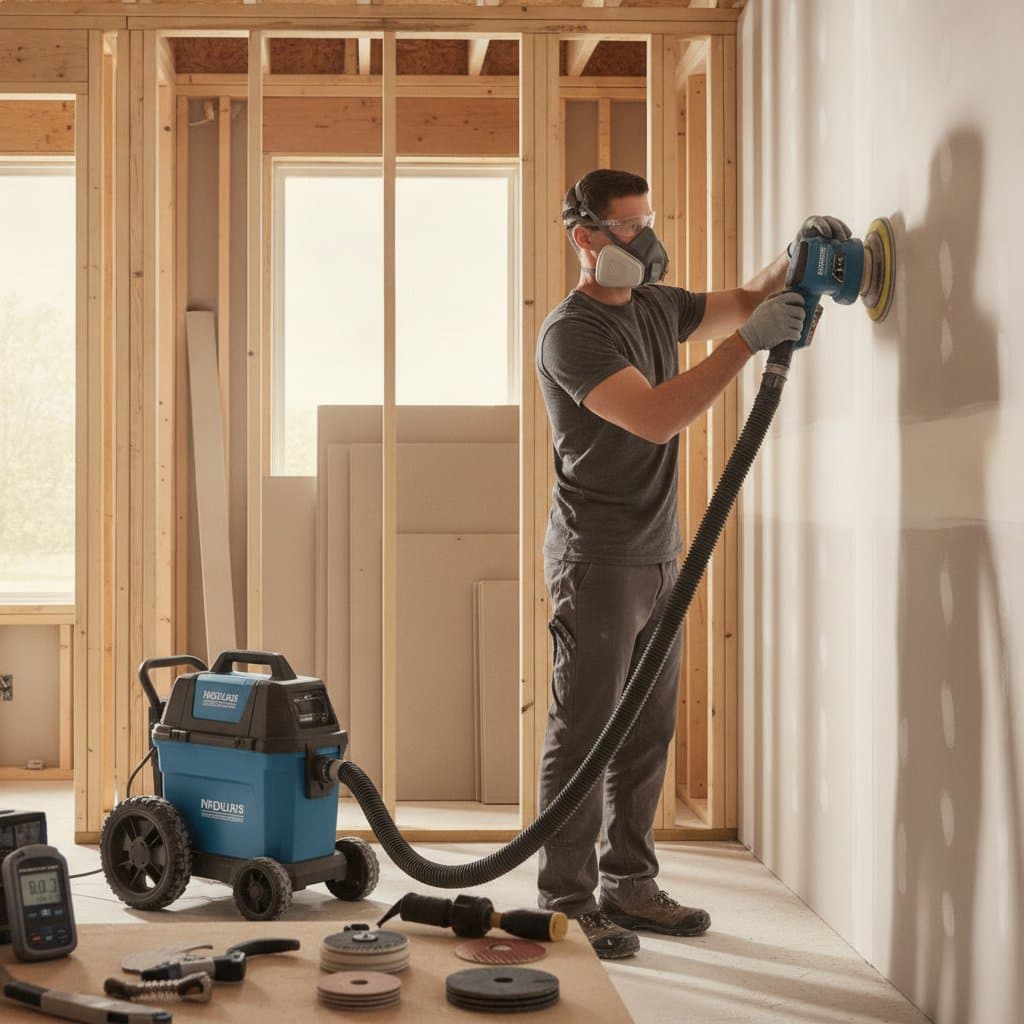
Understanding Corner Construction
Prior to painting, drywall corners demand thorough structural preparation. Install a paper or metal corner bead to reinforce the joint, ensuring straightness and resistance to cracks. Layer drywall mud over the bead, sand it smooth, and seal with primer.
Rushing or omitting steps produces frequent DIY pitfalls:
- Over-sanding that exposes the bead or creates depressions
- Excessive compound application leading to visible ridges
- Low-quality tape that bubbles or peels
- Painting on uncured surfaces
These errors intensify with each subsequent layer. Upon drying of the final paint coat, the defects become permanent.
Why DIY Painters Miss the Problem
Homeowners typically emphasize color selection and coverage over surface preparation. Attention naturally focuses on wall centers, neglecting corners until project completion. Inadequate lighting during work conceals uneven mud or gaps. Post-painting, natural or artificial light exposes every irregularity.
DIY enthusiasts also overlook the time investment for corners. Professionals dedicate nearly half of preparation to refining them. The necessary patience for sanding, compound reapplication, and edge feathering surpasses expectations for most weekend projects.
When to Hire a Professional
Some corner repairs necessitate specialized tools and expertise beyond basic DIY levels. Professionals utilize taping knives, corner trowels, and sanding systems for uniform outcomes.
Engage a contractor or drywall specialist if:
- Cracks emerge along several corners
- The bead loosens or rusts
- Paint bubbles form after drying
- Prior repairs show through new coats
Experts excel at seamless paint blending across old and new areas, preventing color variations or texture discrepancies.
DIY vs. Professional Painting Comparison
| Aspect | DIY Approach | Professional Approach |
|---|---|---|
| Skill required | Moderate to high | Expert-level precision |
| Tools needed | Brushes, rollers, sanding block | Corner trowels, dustless sanders, spray systems |
| Time investment | Several days including drying | Faster completion with efficient techniques |
| Cost | Lower upfront | Higher initial cost but fewer corrections |
| Finish quality | Variable results | Smooth, even, and durable surfaces |
DIY methods suit simple touch-ups or isolated walls, yet full corner restoration gains from professional skills. The superior finish quality frequently warrants the investment.
Preparing for Corner Work
Effective corner painting commences with meticulous preparation.
Pre-Work Checklist
- Inspect for cracks or separation. Address these before priming.
- Clean the area thoroughly. Dust hinders adhesion.
- Apply painter's tape correctly. Position it evenly and remove before full paint drying.
- Prime properly. Primer seals the surface and minimizes uneven absorption.
- Sand lightly between coats. This promotes uniform sheen.
Omission of these steps risks peeling or inconsistent color.
Common DIY Corner Mistakes
- Selecting incorrect tape. Mesh tape applies easily but performs poorly on inside corners. Paper tape endures longer with proper installation.
- Applying excessive mud. Thick layers dry slowly and prone to cracking.
- Employing faulty sanding technique. Inconsistent sanding generates waves visible under paint.
- Painting prematurely. Compound requires full curing before paint application.
- Disregarding lighting direction. Shadows accentuate irregularities.
These mistakes accumulate toward substantial repair expenses.
Making the Right Choice
Evaluate your drywall finishing experience before initiating a painting project. If taping or sanding corners remains unfamiliar, enlist a professional for those phases while managing other aspects independently. This combined strategy controls costs while guaranteeing visible elements adhere to professional criteria.
Professionals offer guidance on durable materials. Flexible corner beads accommodate minor shifts without cracking, and superior primers withstand moisture in high-humidity areas like bathrooms or kitchens.
Frequently Asked Questions
Why are corners more expensive to repair than flat walls?
Corners incorporate multiple layers of compound, tape, and bead. Failure in any layer necessitates complete joint reconstruction. The complexity of labor and surface matching elevates costs beyond simple flat wall fixes.
How long does it take to repair and repaint damaged corners?
A minor corner repair spans one day, while extensive areas require two to three days for drying, sanding, and painting. Professionals expedite processes using rapid-drying compounds and advanced sanding equipment.
How can I prevent future corner damage?
Select premium materials, permit sufficient drying intervals between applications, and regulate indoor humidity. Steer clear of impacts from furniture or cleaning tools. Routine checks identify minor cracks early, averting escalation.