Transform Popcorn Ceilings into Sand Swirl Texture for $800
Popcorn ceilings served a purpose in past decades, yet they now appear outdated. The uneven surface captures shadows and diminishes the appeal of freshly painted walls. Fortunately, replacing this texture with a sand swirl finish proves both accessible and cost-effective. For around $800, a typical ceiling converts into a smooth, luminous expanse that conveys modernity and polish.
Advantages of Sand Swirl Compared to Popcorn
Popcorn texture originally concealed drywall flaws during construction, but it accumulates dust, absorbs light, and deteriorates over time. In contrast, sand swirl texture diffuses light evenly and introduces gentle contours to the overhead surface. This approach masks minor irregularities discreetly while maintaining a classic, artisanal appearance. Professionals favor it for its photogenic quality in media productions and residential renovations alike.
The process involves blending joint compound with fine sand to form interconnected circular motifs. These patterns interact with light variably, creating dimension and focal interest. Such an enhancement revitalizes a space without necessitating drywall replacement or extensive structural alterations.
Cost Breakdown for the $800 Project
The $800 estimate encompasses professional removal of popcorn texture and application of sand swirl finish in a room of average dimensions. Actual expenses vary based on ceiling elevation and area size, yet this figure suits homeowners seeking substantial aesthetic gains without extensive disruption.
Typical allocations include:
- Popcorn removal: $300 to $400, covering scraping, debris disposal, and preparatory smoothing.
- Skim coating and sanding: $200 to $250, focused on leveling and securing the substrate.
- Sand swirl application: $150 to $250, influenced by equipment selection, motif intricacy, and final refinements.
Homeowners may lower expenses by performing the scraping phase independently, provided the surface tests negative for asbestos. Professional testing ensures safety prior to any disturbance.
Essential Tools and Materials
For those undertaking the project personally, the required items remain minimal. Gather the following:
- Ready-mixed joint compound.
- Fine, clean sand.
- Mixing paddle attached to a drill.
- Wide drywall texture brush or equivalent applicator.
- Pole sander for finishing.
- Dust sheets and painter's tape for protection.
Combine approximately one cup of sand per gallon of joint compound to achieve a smooth yet textured consistency. Test the swirling technique on a practice surface to refine hand movements before applying to the ceiling.
Applying the Sand Swirl Technique
The appeal of sand swirl derives from its fluid application method. Load the brush sparingly with the mixture, apply it to the ceiling, and rotate the wrist in overlapping semicircles. Aim for a rhythmic, natural repetition across the surface. Proceed section by section to prevent drying inconsistencies, and apply uniform pressure for balanced depth.
Experienced applicators recommend these strategies, drawn from high-stakes environments demanding flawless results under intense illumination:
- Illumination assessment: Position a light source obliquely to identify disparities while the mixture remains pliable.
- Curing period: Allow full drying before applying primer or paint, as premature steps may diminish texture definition.
- Paint selection: Opt for flat or matte finishes to preserve subtlety; high-gloss options amplify surface variations.
Scalable Budget Approaches
Accessible design accommodates diverse financial plans. Consider these tiers for achieving a sand swirl ceiling:
- DIY approach: Handle scraping and texturing with standard tools over a weekend. Materials total roughly $200.
- Hybrid method: Engage professionals for removal, then apply texture independently. Overall cost approximates $500.
- Complete professional service: Delegate all phases, from preparation through painting, to experts. Budget around $800, with completion in several days.
Upkeep and Durability
A finished sand swirl ceiling requires minimal ongoing care. Periodic dusting with a dry mop or microfiber cloth preserves its clarity. Unlike popcorn, it resists flaking and shadow buildup, reducing repaint frequency. For localized repairs, prepare a small quantity of mixture and replicate the pattern with the original brush.
Key Strategies for Optimal Results
- Pre-project verification: Confirm absence of asbestos in existing texture through testing.
- Floor safeguarding: Employ heavy-duty plastic sheeting to contain particulates effectively.
- Pattern uniformity: Maintain steady brush pressure to avoid distortions; repeated practice builds proficiency.
- Primer application: Use a high-quality product to seal the texture and enhance paint bonding.
- Lighting integration: Select warm white bulbs to accentuate the swirls without harsh contrasts.
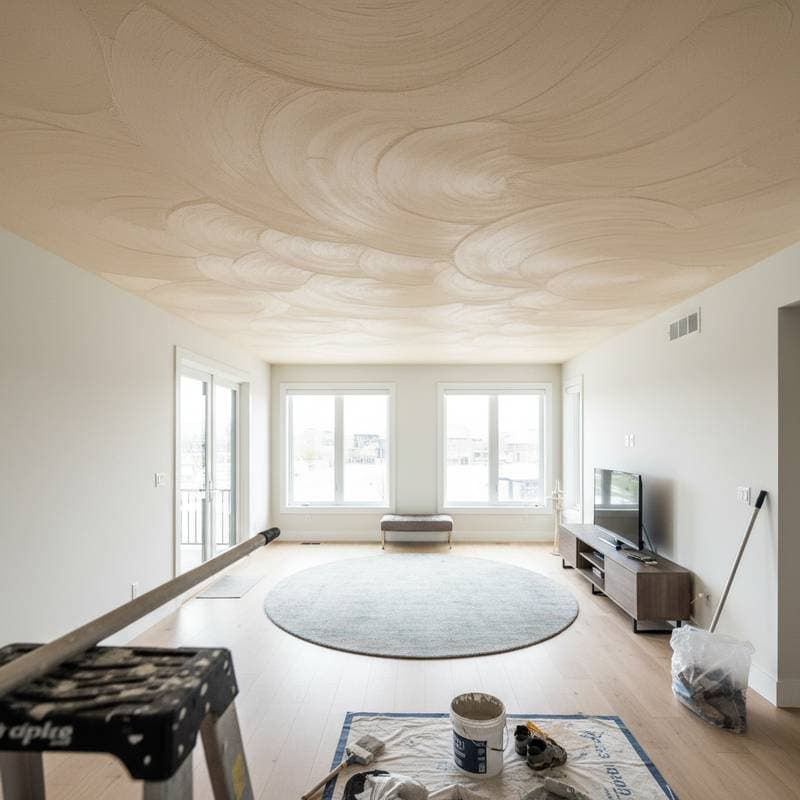
Experiencing the Upgraded Space
After installing sand swirl texture, the room undergoes a noticeable transformation. Ceilings appear elevated, atmospheres more serene, and light distribution more dynamic. This understated modification delivers profound impact.
Effective design emphasizes intelligent choices over extravagance. Sand swirl texture demonstrates how a nuanced overhead element can reshape an entire interior. The result stands as a testament to thoughtful, resilient craftsmanship tailored to personal vision.


