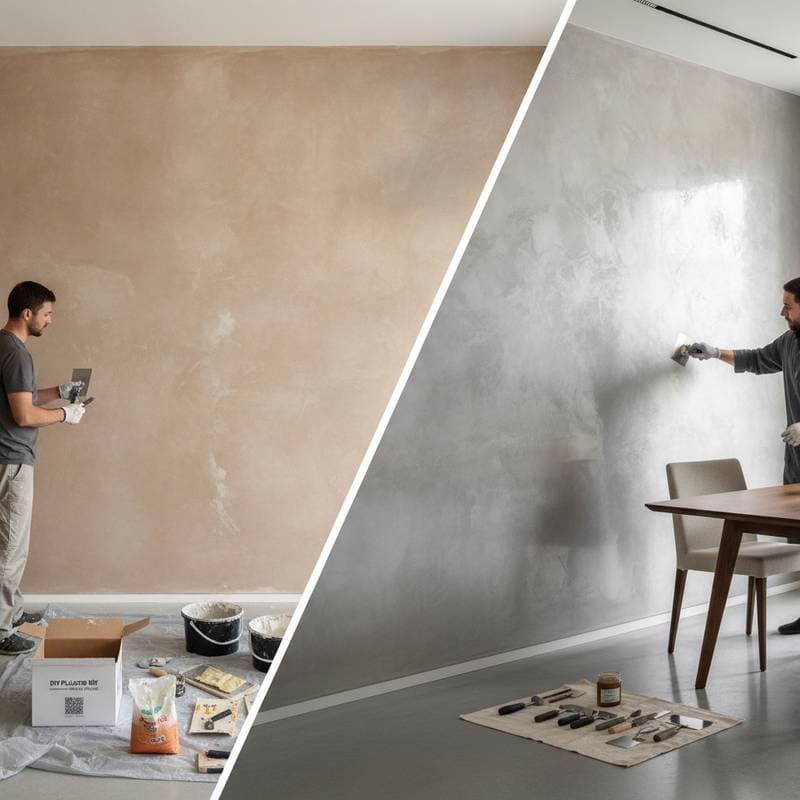
DIY Micro-Texture: An $800 Alternative to Flat Walls
Flat walls serve a purpose, but they often lack vitality. For those seeking warmth, depth, and a refined aesthetic without extensive renovations, micro-texture offers an effective solution. This technique replicates the sophistication of Venetian plaster or linen-finish paint at a fraction of the professional cost, achievable for under $800 through careful material selection and application.
Understanding Micro-Texture and Its Benefits
Micro-texture involves applying a subtle layer of texture to drywall surfaces. It provides a gentler alternative to knockdown or orange peel finishes while surpassing the simplicity of smooth walls. This balance creates soft shadows under lighting, enhancing the perception of depth and intentional design.
Professionals favor micro-texture for its versatility in photography, its ability to mask minor surface flaws, and its capacity to impart a bespoke quality to interiors. The finish integrates seamlessly across styles, from modern and coastal to rustic and minimalist, adding nuance without overshadowing furnishings or artwork. For renters, certain methods allow for reversible application, preserving flexibility.
Materials and Budget Considerations
Professional-grade results require accessible materials scaled to your budget. The following breakdown outlines options to maintain clarity and encourage experimentation.
Low-Budget Option (Under $200)
- Joint compound or lightweight spackle
- 12-inch drywall knife
- Old T-shirt or microfiber cloth
- Primer and paint
Mid-Budget Option (Around $400)
- Pre-mixed texture compound
- Texture roller or sea sponge
- Satin or low-sheen paint to enhance light reflection
- Protective drop cloths and painter's tape
Higher-Budget Option (Up to $800)
- Specialty lime or clay-based plasters
- Venetian trowel set
- Tint pigments for customized hues
- Sealant or wax to ensure durability
Success in any tier depends on consistent application and deliberate pacing. Focus on these elements to achieve a refined outcome.
Step-by-Step Application for Subtle Micro-Texture
-
Prepare the Surface
Thoroughly clean the walls and repair any imperfections. Lightly sand to eliminate gloss, ensuring the texture adheres uniformly. -
Prepare the Mixture and Test
Combine joint compound with water to achieve a creamy consistency that holds shape without dripping. Apply a sample on scrap material to verify texture and adjust as needed. -
Apply the Texture Layer
Spread a thin, uniform coat using a knife or roller. Embrace natural variations, as the appeal of micro-texture lies in its organic flow rather than rigid perfection. -
Refine the Surface
Once the layer partially dries, gently drag a damp cloth or sponge across it to soften peaks and smooth transitions. This step reveals the emerging subtle contours. -
Prime and Finish with Paint
After full drying, apply primer followed by paint. Opt for satin or eggshell sheens to amplify highlights and shadows; flat paints yield a more subdued integration.
Insights from Professional Design Applications
In high-visibility settings like television productions, transformations must perform under intense lighting. Micro-texture excels by diffusing harsh glare, introducing softness, and conveying luxury without ostentation. To replicate this at home, consider how the finish interacts with ambient light sources such as sidelighting from lamps or natural window illumination, which accentuates dimensionality in compact areas.
Maintain precision at edges by taping trim and ceilings meticulously, fostering a deliberate appearance. For optimal results, remove tape while the compound remains slightly tacky, preventing jagged lines.
Evolving Your Micro-Texture Finish
One advantage of micro-texture is its adaptability to changing preferences. Sand the surface lightly for a sleeker profile or apply color washes to refresh the look. Techniques like soft glazes or dry-brushing can emphasize textured elements effectively.
Renters benefit from overlaying removable wallpaper on textured walls, introducing patterns temporarily. As needs shift, the finish accommodates new paint applications, lighting adjustments, or furniture arrangements, ensuring long-term relevance.
Essential Techniques for Optimal Results
- Test the texture mixture in an inconspicuous area before full application.
- Apply in manageable sections to retain control over consistency.
- Clean tools promptly between uses to avoid uneven buildup.
- Sand lightly to correct overly prominent areas.
- Evaluate progress from various angles and under different lighting conditions.
Micro-texture empowers homeowners to craft personalized, elegant walls affordably. This method delivers enduring sophistication, enhancing spaces with subtle artistry that aligns with evolving lifestyles.