Caulking Order Matters: Avoid This Costly Painting Error
A fresh paint job can transform a home faster than almost any other project. Even the most beautiful color can look sloppy if the prep work is not right. One of the biggest hidden mistakes both professionals and DIYers make is caulking in the wrong order. This step can make or break the final finish.
Why Order Matters So Much
Caulking seals gaps, smooths edges, and keeps moisture out. When applied at the wrong moment, that same flexible bead can trap dust, block primer adhesion, or pull away from paint later. The key is timing. Apply caulk after cleaning and priming, not before. This change keeps surfaces sealed and paint looking crisp for years.
When caulk goes on before priming, the primer cannot bond evenly to the surface beneath it. The result is uneven sheen, cracking at edges, or visible seams under the topcoat. A flawless finish requires correct timing.
The Correct Caulking Sequence
Follow this order to keep the project looking professional.
- Clean and dry everything. Wipe away dust, old caulk, and loose paint. A damp cloth or mild cleaner works well, followed by complete drying. Paint and caulk perform poorly on moist surfaces.
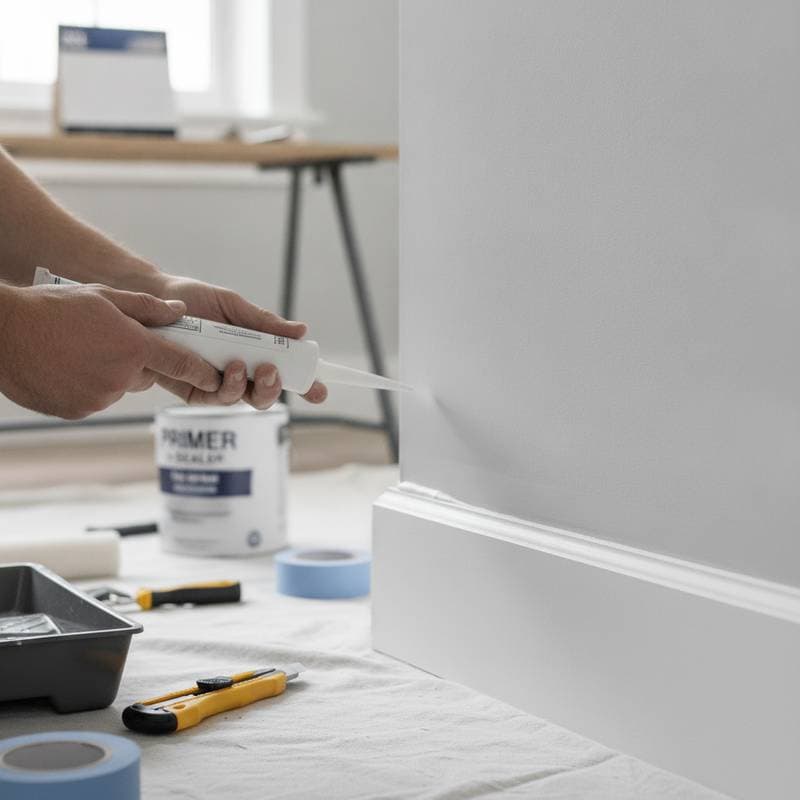
- Apply primer first. Primer seals porous surfaces, evens absorption, and gives caulk a stable base. Skipping this step often leads to peeling or dull patches later.
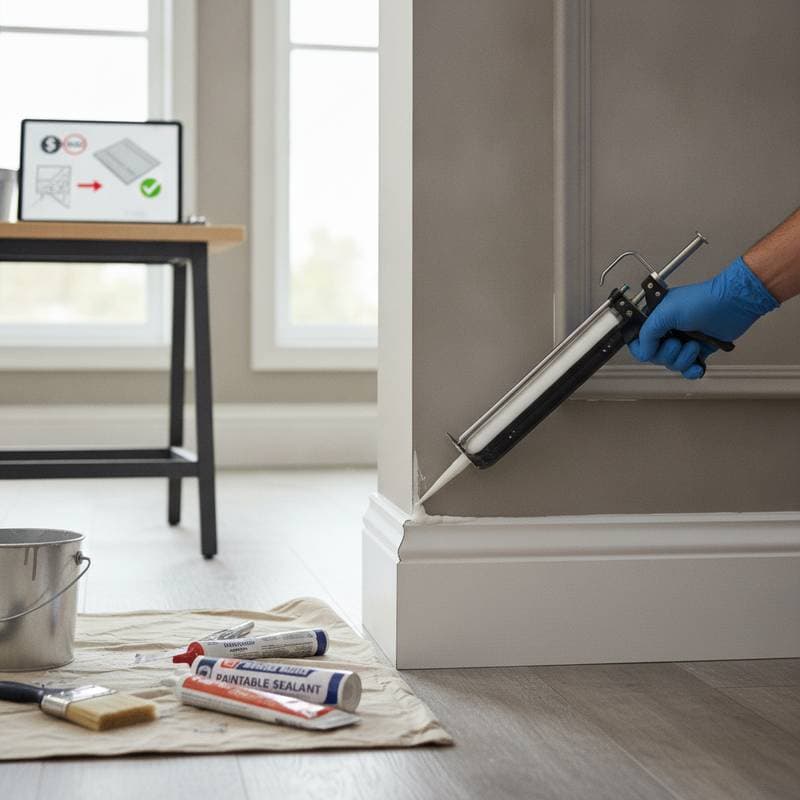
- Apply caulk after primer. Use paintable latex or siliconized acrylic caulk for interiors. Smooth the bead with a damp finger or finishing tool. Remove excess material before it skins over.
- Allow the caulk to cure. Give it time to set before painting. Check the label for cure instructions and confirm the surface feels firm.
- Finish with paint. Once cured, paint seals everything together and creates a single protective layer.
Budget-Friendly Tips
Use pre-tinted painter caulk that matches the wall color for smaller touch-ups. This choice saves time and reduces the amount of paint needed.
Invest in a quality caulk gun with smooth pressure control for cleaner lines and less waste. For higher budgets, select pro-grade caulks with mold resistance and strong flexibility ratings. These products last longer in humid rooms.
Technique always beats expensive gear. Good prep, clean surfaces, and steady hands produce the best results.
Common Mistakes to Watch For
Caulking before priming traps raw wood or drywall under a flexible layer that paint cannot seal properly. Skipping cure time leaves wet or soft caulk under paint, which leads to wrinkles or dull spots.
Over-application creates thick beads that shrink, crack, or look lumpy once dry. Ignoring temperature also causes problems. Caulk performs best in moderate conditions. Extreme heat or cold makes smoothing difficult.
These errors may not appear until weeks later. Order and patience therefore matter greatly during surface preparation.
Pro Tips for Success
Great finishes come from great prep. Check caulk lines from multiple angles before painting. Touch up with a damp cloth if ridges or gaps appear.
Keep a small container of matching paint for edge corrections once everything dries. This quick fix keeps trim and corners looking sharp.
Maintaining Painted Surfaces
Once surfaces are sealed and painted in the right order, maintenance becomes straightforward. Wipe gently with a damp cloth. If cracks appear years later, a quick re-caulk over paint restores tightness and cleanliness. Smart prep reduces future effort and keeps walls and trim looking sharp.