The Essential Role of Sanding in Professional Painting
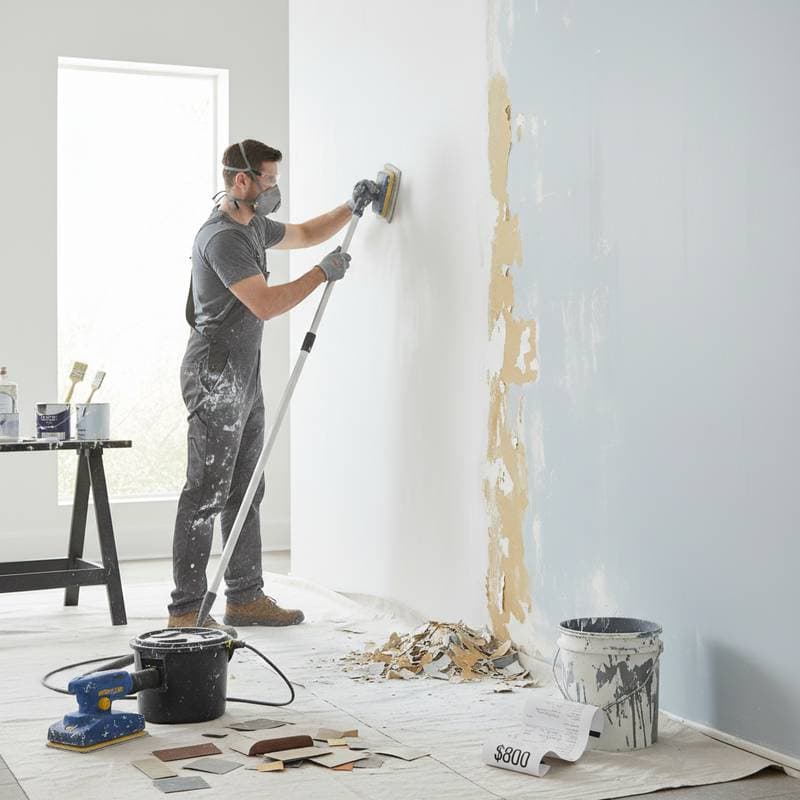
Homeowners envision walls with a smooth, flawless finish after a paint job. However, many overlook a critical step that occurs before any paint application. Neglecting to sand walls can transform a straightforward project into a major issue, resulting in uneven surfaces, poor adhesion, and repair costs up to $800 per room. Sanding establishes the base for a lasting, attractive result, though it requires time and effort.
This resource outlines the reasons sanding proves vital, its influence on the end product, associated expenses, and strategies for deciding between professional assistance and personal handling.
Detailed Cost Analysis for Wall Preparation
Standard Pricing Tiers
- Routine sanding and initial setup: $150 to $300 for a standard room
- Comprehensive sanding including fixes and primer application: $400 to $800 per room
- Advanced prep using dust-free sanding equipment: $900 to $1,200 per room
Core Components of the Service
- Thorough examination of surfaces to identify issues like cracks or inconsistencies
- Application of light to medium sanding across all wall areas
- Complete dust extraction and site tidying
- Primer layer to lock in the prepared surface prior to painting
- Basic filling of minor imperfections such as nail holes or hairline cracks
Additional Charges
- Intensive sanding for rough textures or high-gloss prior finishes
- Extensive repairs for significant damage like large gaps or moisture effects
- Clearing away stubborn elements such as wallpaper glue or remnants
- Advanced dust management setups suitable for homes with residents present
Influences on Total Expenses
| Factor | Influence on Price | Specific Instances |
|---|---|---|
| Surface state | Medium to substantial | Drywall fractures, pronounced textures, or irregular patches |
| Paint variety and sheen | Medium | High-gloss or oil formulations demand extra abrasion |
| Room dimensions | Significant | Bigger spaces extend labor and supply needs |
| Access challenges | Medium | Elevated areas or confined passages prolong work time |
| Tools employed | Minor to medium | Vacuum-integrated or precision sanders elevate fees while enhancing quality |
Step-by-Step Project Schedule
Wall prep and painting follow a structured sequence of phases. Grasping these stages allows homeowners to establish practical timelines and coordinate effectively.
-
Initial assessment and setup (1 to 2 hours per room)
Inspect walls for defects including fissures, protruding fasteners, and irregular areas. Relocate furnishings, shield electrical fixtures, and safeguard surroundings against debris. -
Sanding phase (2 to 4 hours per room)
Experts employ extendable pole sanders or powered orbital devices to level all surfaces uniformly. Select fine-grit abrasives to achieve smoothness without harming the underlying material. -
Debris management (30 to 60 minutes)
Eliminate all particles prior to subsequent steps. Deploy industrial vacuums and adhesive cloths to guarantee a residue-free environment. -
Primer application (1 to 2 hours, factoring in cure time)
Apply sealant to secure the smoothed area and reveal any overlooked flaws requiring additional refinement. -
Final painting (4 to 6 hours for dual layers)
Introduce hue and safeguard coating, yielding a uniform, polished appearance.
Professionals typically finish a room in two days. Accelerating phases or omitting them invites defects that demand future corrections.
Selecting a Dependable Painting Professional
Choosing a skilled expert minimizes risks and maximizes return on investment. Follow these guidelines to identify and assess suitable candidates for prep and painting tasks.
-
Conduct thorough research to compile a list of established firms or solo operators. Prioritize feedback that highlights meticulous prep work and precision.
-
Solicit itemized estimates breaking down sanding, sealing, and coating processes. Ambiguous proposals may signal potential oversights in foundational steps.
-
Confirm credentials and protection to verify compliance with regional regulations and adequate coverage for liabilities.
-
Seek client testimonials and examine images from comparable undertakings to gauge past performance.
-
Examine agreements meticulously. Verify inclusions for prep techniques, supply specifications, and post-work cleanup duties.
Trustworthy specialists openly address prep necessities and articulate sanding's role in superior outcomes. Steer clear of those minimizing its value or claiming sealants suffice independently.
Evaluating Workmanship and Final Checks
Upon completion, scrutinize results in optimal illumination. Circumnavigate the space and observe from multiple perspectives to detect inconsistencies.
Professional benchmarks encompass:
- Absence of coarse spots or streaky application marks
- Seamless blending at mended and untouched sections
- Uniform tint distribution without matte or reflective variances
- Precise borders along adjoining surfaces like moldings or overheads
Should discrepancies appear, ethical providers rectify them without delay. Standard offerings include brief guarantees against defects such as flaking or blistering.
Strategies for Successful Project Execution
For single-room updates or full-home refreshes, prioritize prep demands from the outset. Budget and schedule adequately for abrasion and sealing alongside coating. This proactive approach yields enduring quality and averts premature overhauls.
Walls exhibiting flaws, sheen remnants, or spotty fixes necessitate expert abrasion. View it as a cornerstone investment safeguarding against the $800 overhaul. Proper groundwork delivers impeccable surfaces and sustained appeal.
Common Questions on Wall Sanding
1. What is the usual expense for sanding walls prior to painting?
Sanding costs $150 to $800 per room, varying with surface quality and prep intensity. Simpler tasks on fresh drywall incur lower fees, whereas aged or patterned walls demand greater effort and equipment, increasing totals.
2. How does the duration of sanding and prep compare to the painting phase?
Prep time mirrors or exceeds painting duration. Expect 2 to 4 hours for abrasion and clearing in a average room before sealing and coating commence. Haste here produces irregular layers and evident shortcomings.
3. What methods control dust during the sanding process?
Experts utilize vacuum-attached dustless tools to trap particles on contact. For self-managed projects, seal air pathways, operate a heavy-duty vacuum often, and clean with moistened fabrics pre-coating. Effective management promotes pristine outcomes and safer conditions.


