Discover Why 220-Grit Sanding Changes Paint Results
Surface preparation determines whether a paint job ends up smooth and durable or uneven and short-lived. Many homeowners focus on choosing colors, finishes, and brands, but they underestimate the role of sanding. The difference between a professional-grade finish and a patchy one often comes down to the grit of sandpaper used before painting. Among all options, 220-grit sanding holds a special place for both contractors and careful DIY painters.
This guide explains why 220-grit sanding matters, what benefits it provides, and how to use it correctly. It also explores how to decide when to complete sanding yourself or hire a professional, what costs to expect, and what factors influence those costs.
Why 220-Grit Sanding Changes Paint Results
Professional painters rely on 220-grit sanding for several reasons. It enhances adhesion, texture, and final appearance, creating a level finish that resists cracking and peeling.
Improved Paint Adhesion
Paint needs a slightly textured surface to grip properly. A surface that is too smooth can cause paint to slide or form bubbles, while one that is too rough will show scratches beneath the finish. 220-grit sanding creates a micro-level texture that balances smoothness with sufficient tooth for the paint to cling.
Elimination of Minor Imperfections
Even surfaces that look clean often contain invisible specks, raised grain, or dried roller marks. Light passes with 220-grit sandpaper even out these blemishes, preventing them from telegraphing through the paint layer.
Consistent Sheen and Finish
Without proper sanding, some sections of paint absorb more than others, leading to uneven gloss or flat spots. A uniform surface after 220-grit sanding helps maintain consistent light reflection across the project.
Reduced Paint Waste
Rough or unprepared surfaces require extra paint to fill pores and scratches. When the surface is properly sanded, paint spreads more efficiently, reducing the total amount needed.
Longer Paint Lifespan
Better adhesion and smoother texture mean fewer chips and cracks over time. Paint clings firmly to the substrate, resisting moisture and temperature changes that cause peeling.
How the Sanding Process Works
Sanding occurs in several stages, each with a purpose that leads toward the 220-grit finish.
- Surface Cleaning: Begin by washing or wiping the surface to remove dust, oils, and grime. Paint adheres poorly to dirty surfaces, so this step is critical.
- Rough Sanding: If the surface contains old paint or uneven patches, start with coarser grit such as 80 or 120 to smooth irregularities.
- Intermediate Sanding: Move to a mid-range grit like 150 or 180 to refine the texture and remove any marks left by earlier sanding.
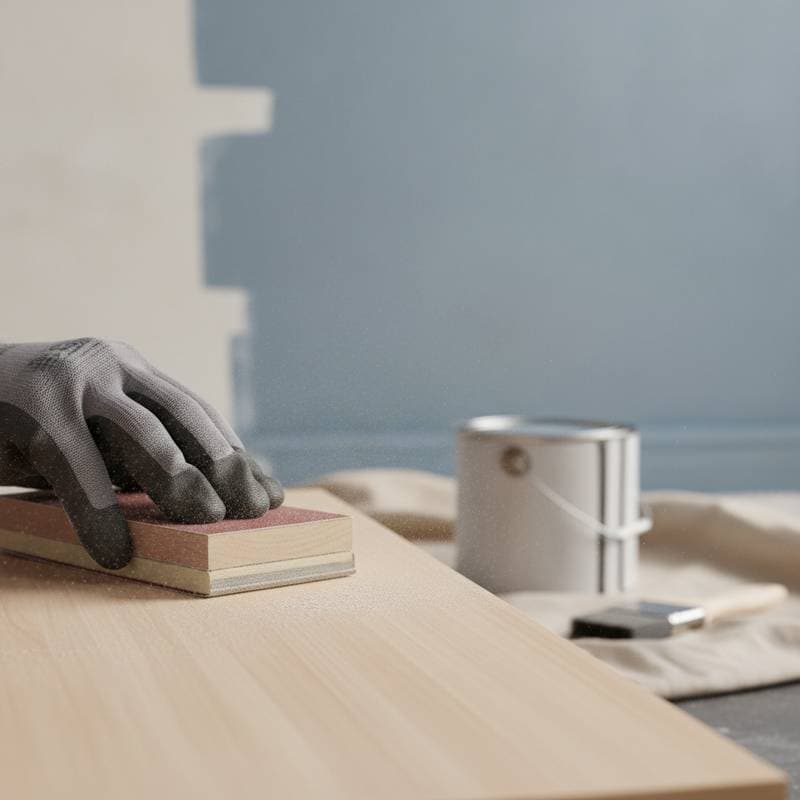
- Final 220-Grit Sanding: Use light, even pressure. The goal is not to remove material but to polish and prepare the surface for primer. Always sand along the grain on wood surfaces to avoid scratches.
- Dust Removal: After sanding, wipe the surface with a tack cloth or use a vacuum attachment. Even small particles can cause bumps under paint.
- Primer and Paint Application: Once clean and dry, apply primer. Some professionals lightly sand again with 220-grit after priming for an ultra-smooth finish before applying the topcoat.
Tools and Materials Needed for 220-Grit Sanding
Whether you plan to do the work yourself or hire help, knowing what tools are involved helps set expectations.
- 220-grit sandpaper or sanding sponge for fine finishing
- Orbital or palm sander for larger flat surfaces
- Sanding block for edges and corners
- Vacuum or tack cloth for dust removal
- Drop cloths and painter tape to protect surroundings
- Primer and paint suited to the surface type
- Safety gear including goggles and a dust mask
Quality Assurance and Inspection
A properly sanded surface feels smooth yet slightly textured. After the first coat of paint, check for visible marks, uneven sheen, or rough patches. Lightly sanding with 220-grit between coats can correct minor issues. Professionals often perform a final inspection using angled lighting to highlight imperfections before declaring the job complete.
Mistakes to Avoid
- Skipping sanding entirely. Paint will not adhere correctly to glossy or uneven surfaces.
- Using the wrong grit. Too coarse a grit leaves scratches that show through paint. Too fine a grit can make surfaces slippery and reduce adhesion.
- Applying too much pressure. Pressing hard can create gouges or remove too much primer or wood.
- Failing to clean dust. Residual dust causes bumps and prevents paint from bonding evenly.
- Rushing between coats. Each layer must dry completely to prevent texture and adhesion issues.
Planning Your Project
Assess the size and condition of the surfaces first. Gather all tools and materials before starting. Schedule sufficient time for cleaning, sanding, and drying between coats.
Frequently Asked Questions
How much does 220-grit sanding add to the total painting cost?
Fine sanding usually adds between $0.50 and $1.25 per square foot to the overall project cost. The expense reflects the extra labor and precision required. While it increases the upfront price, it often prevents costly repainting later.
How long does sanding with 220-grit take before painting?
For a typical room, fine sanding can take two to four hours depending on surface size, accessibility, and condition. Furniture or detailed trim may require more time due to intricate edges. Professionals use orbital sanders to speed up the process without sacrificing quality.
Can I skip 220-grit sanding if I use primer?
Primer improves adhesion but does not replace fine sanding. Without proper surface refinement, primer may not adhere evenly, leading to peeling or uneven finish. Light sanding before and sometimes after priming yields the smoothest results.
How do I choose between a handyman and a painting contractor for sanding and painting work?
A handyman may handle small-scale sanding and touch-up jobs, such as doors or cabinets. For larger projects, multiple rooms, or surfaces needing repair, hire a licensed painting contractor. Contractors offer warranties, professional equipment, and better dust control systems.
What should I expect during professional sanding and painting?
Professionals start with inspection and preparation, then proceed through multiple sanding phases ending with 220-grit refinement. After cleaning dust, they apply primer and paint in controlled conditions. Expect some noise and limited access to the work area during sanding and drying.
What problems can appear if sanding is done incorrectly?
Improper sanding can cause visible scratches, uneven paint absorption, or peeling after curing. Over-sanding may also expose raw material or create shiny spots where paint struggles to adhere. Careful technique with 220-grit paper prevents these issues and ensures long-lasting results.
Achieving Professional Results
Proper 220-grit preparation leads to finishes that look sharp and last longer. Homeowners who invest time in this step enjoy fewer touch-ups and stronger protection against daily wear.