The $800 Sanding Mistake DIY Painters Should Avoid
Many homeowners approach painting projects with enthusiasm, yet they often see results peel, bubble, or flake soon after completion. The primary reason lies not in the paint quality or tools, but in inadequate surface preparation. Sanding appears straightforward, but neglecting or executing it improperly leads to expensive repairs and material waste. For numerous DIY painters, this oversight results in an $800 expense, representing the typical cost to address adhesion failures and repaint impacted areas.
Grasping the importance of sanding, identifying common errors, and applying correct methods enables homeowners to conserve funds and attain professional-level finishes from the outset.
Why Sanding Matters Before Painting
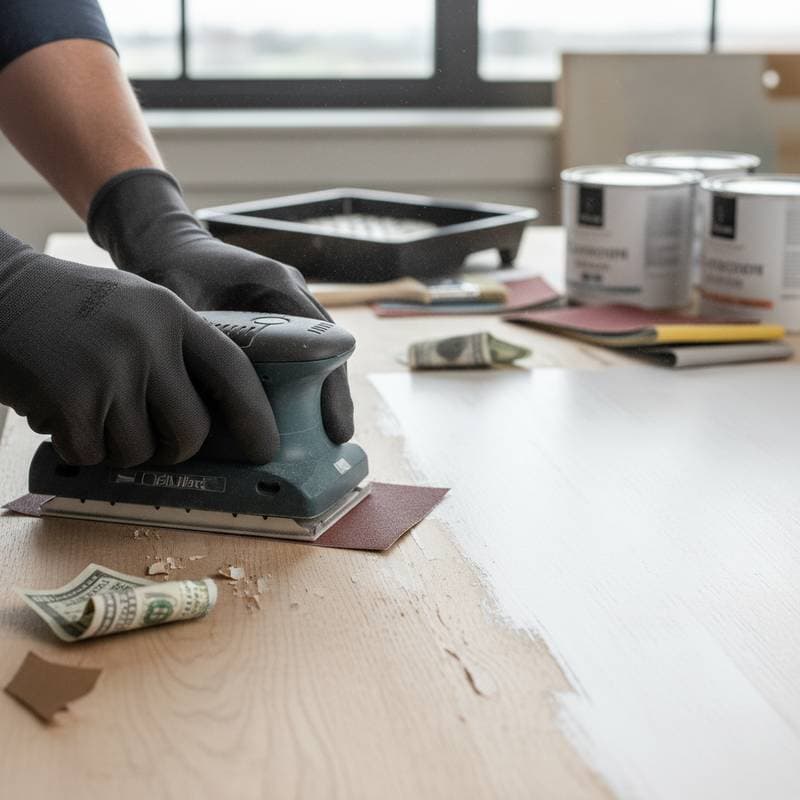
Sanding readies surfaces for paint by smoothing irregularities, eliminating gloss, and exposing tiny pores that allow secure paint bonding. Without adequate sanding, paint merely rests atop prior layers rather than merging with them. This fragile connection causes chipping and peeling, regardless of premium paint selection.
Sanding further evens out repaired spots, clears away dirt or grease, and creates uniform texture on walls, trim, cabinets, or furniture. Such preparation permits even paint distribution and avoids noticeable streaks or coarse areas that detract from the overall look.
The Cost of Skipping or Rushing Sanding
Inadequate adhesion prompts a range of preventable costs for homeowners. Repainting one room typically ranges from $500 to $800, based on dimensions and paint grade. These figures cover labor, fresh paint, primer, and surface fixes. Exterior work often surpasses $1,000, factoring in extra prep and weather-resistant measures.
Subpar sanding elevates paint usage as well. Uneven or coarse surfaces soak up more paint, demanding additional layers for full coverage. This raises supply expenses and prolongs timelines. Paint producers might also invalidate warranties if adhesion issues stem from deficient preparation.
Typical Sanding Costs for DIY and Professional Work
| Project Type | DIY Material Cost | Professional Service Cost | What’s Included |
|---|---|---|---|
| Interior Walls | $30 - $70 | $200 - $400 | Sanding, dust removal, preparation |
| Trim and Doors | $25 - $60 | $150 - $300 | Detailed sanding, caulking prep |
| Cabinets or Furniture | $40 - $90 | $250 - $500 | Multi-step sanding and priming |
| Exterior Siding | $50 - $120 | $300 - $800 | Power sanding, cleaning, protection |
DIY enthusiasts invest modestly in sandpaper, blocks, and safety items. The true burden involves time and possible redo efforts. Professionals command higher fees, yet their thorough prep yields durable outcomes and optimal primer-paint integration.
Factors That Affect Sanding Quality and Cost
Surface Condition: Areas with flaking paint, discoloration, or coarse textures demand intensive sanding and extended effort. Mending compromised drywall or timber prior to sanding inflates the outlay.
Material Type: Wood, metal, and drywall necessitate distinct grit sizes and methods. Selecting inappropriate grit either leaves residues or inflicts excessive damage.
Tools and Equipment: Electric sanders accelerate progress but demand careful handling to prevent digs. Hand sanding proceeds more slowly yet suits fragile tasks better.
Dust and Cleanup: Sanding generates fine particles that disperse readily, necessitating thorough tidying and safeguards. Experts often employ vacuum-equipped sanders to curb debris, marginally raising costs while boosting productivity.
Correct Sanding Techniques to Prevent Paint Failure
- Start with the Right Grit: Initiate with medium-grit paper (120-150) to strip shine or light flaws, then switch to finer grit (180-220) for a refined foundation.
- Work in Sections: Segment expansive walls or areas to apply steady pressure and achieve uniform results.
- Clean Thoroughly Before Painting: Post-sanding, swab surfaces using a moistened cloth or tack cloth to eliminate residue. Dust-contaminated paint bonds poorly.
- Prime When Necessary: Apply primer over raw wood, mended sections, or shiny finishes following sanding to seal and ready for topcoats.
- Check Lighting Angle: Employ angled illumination to detect inconsistencies requiring further sanding prior to painting.
Value and Long-Term Return on Proper Sanding
Thorough sanding prolongs paint durability by multiple years and curtails ongoing upkeep expenses. Prepared surfaces withstand humidity, fractures, and color loss effectively. Homeowners benefit from enhanced aesthetics, as even finishes diffuse light uniformly.
In the long run, dedicating additional hours to prep spares hundreds in dollars and averts early repaints. Professional execution of sanding and readying elevates a home's interior or exterior allure. Prospective buyers frequently appraise paint quality, which impacts property valuation and minimizes worries over dampness or structural flaws during evaluations.
Money-Saving Strategies for Better Sanding Results
- Select durable sandpaper that endures longer and shears uniformly.
- Handle initial prep yourself, such as detaching fixtures, taping edges, and washing areas before engaging a painter.
- Lease electric sanders for sizable undertakings rather than purchasing outright.
- Time painting for arid weather to facilitate surface drying and coat hardening.
- Steer clear of excessive sanding, which risks baring substrate or forming dips needing extra primer.
Planning Your Budget
Allocate for sanding and prep by considering supplies, duration, decontamination, and fixes. For average interior spaces, designate 10 to 15 percent of the painting total to groundwork. Early commitment to solid sanding forestalls steeper later costs. Prior to launch, examine surfaces, assemble suitable tools, and weigh professional assistance against project scale.
Frequently Asked Questions
When is the best time to sand and paint for optimal results?
Dry, temperate weather proves ideal. High moisture levels can retain dampness and impair bonding. Strategic scheduling supports seamless spreading and enduring performance.
What grit sandpaper should I use for different surfaces?
For wood trim or doors, start with 120-grit to remove old finish, then 220-grit for smoothness. Drywall patches benefit from 150-grit initially, finishing at 220-grit. Metal surfaces require 180-grit to avoid scratches.
How do I know if I have sanded enough before painting?
Run your hand over the surface; it should feel smooth without snags. Inspect under raking light for shadows indicating highs or lows. If primer or paint tests show even absorption, proceed confidently.


