The $800 Sanding Mistake That Undermines Paint Adhesion
Paint projects achieve success or encounter failure during the initial preparation stages, long before any brush applies color. Homeowners frequently learn this lesson the hard way when peeling, bubbling, or irregular finishes emerge shortly after completion. In many cases, the root issue stems from inadequate sanding, a step that, if mishandled, results in hundreds of dollars lost to materials, labor, and corrections. By grasping the role of surface preparation in paint adhesion, individuals can avoid such setbacks and secure a durable, expert-level outcome.
The Role of Sanding in Ensuring Paint Adhesion
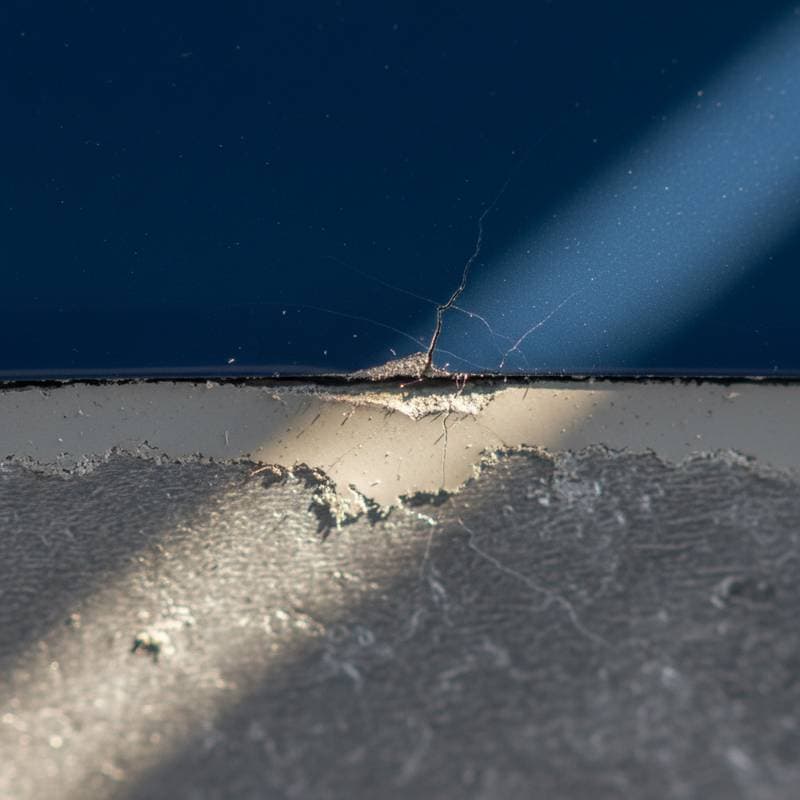
Sanding extends beyond achieving a smooth surface; it generates a fine texture that enables paint and primer to adhere firmly. Proper execution removes prior coatings, levels out flaws, and exposes the material's pores for better integration. Neglecting this step or executing it poorly leaves paint merely sitting atop the surface, fostering weak connections that result in peeling, cracking, and the need for repainting.
Initial differences between adequately sanded and inadequately prepared surfaces may escape notice. Problems surface later, as environmental factors like humidity or temperature fluctuations cause separation. Professionals approach sanding with precision, recognizing its foundational importance to project longevity.
Project Cost Analysis
Typical Cost Ranges
- Basic repaint incorporating thorough sanding: $1,200 to $2,500
- Standard interior or exterior undertaking: $2,800 to $4,500
- High-end restoration requiring remedial sanding: $5,000 to $8,000
Standard Inclusions
- Thorough inspection to identify existing layers
- Cleaning and degreasing of the surface
- Layered sanding using progressively finer grits
- Dust elimination and adhesion verification
- Primer layer followed by two topcoats
Additional Expenses
- Addressing failures from subpar sanding: $600 to $1,000
- Stripping away flaking or blistering layers: $300 to $700
- Reapplication of primer on affected areas: $200 to $400
- Treatment for moisture or mold prior to painting: $150 to $350
Influences on Total Expenses
| Factor | Impact on Cost | Specific Instances |
|---|---|---|
| Surface Material | Elevated for absorbent or irregular types | Unfinished wood, patterned drywall |
| Existing Finishes | Moderate escalation | High-gloss or oil-based paints |
| Accessibility Challenges | Increases labor charges | Elevated ceilings, outer walls |
| Consequences of Faulty Sanding | Substantial rise | Flaking, blistering, or bubbling |
Origins of the $800 Sanding Mistake
A frequent issue arises when individuals select inappropriate sandpaper grit or omit sanding entirely. Coarse grits create gouges that compromise smoothness, whereas overly fine ones polish the surface, diminishing paint grip. Equally problematic is neglecting to eliminate sanding dust, as even a light residue forms an obstructive layer that hinders uniform bonding.
Hastening through sanding produces inconsistent pressure and texture variations. Effective paint adhesion relies on even surface roughness across the area. Professionals assess the substrate, conduct adhesion tests, and tailor techniques accordingly, ensuring balanced preparation.
Project Timeline Overview
Standard painting endeavors with comprehensive sanding span multiple days. Preparation typically accounts for approximately half the duration, as each sanding, cleaning, and priming stage requires drying time. Those who bypass these elements to accelerate progress often confront premature repainting demands. Remedying adhesion issues post-application proves more time-intensive and expensive than initial thoroughness.
Comparing DIY and Professional Approaches to Sanding and Painting
Scenarios Suited to DIY Efforts
Straightforward interior walls coated in latex paint, featuring few defects, may lend themselves to homeowner sanding and repainting. Employ a sanding pole equipped with medium-grit paper, ensure complete dust clearance, and apply high-quality primer for satisfactory outcomes. Patience and uniform application remain essential.
Instances Requiring Professional Expertise
Engage specialists for exterior work, woodwork, cabinets, or surfaces with oil-based or glossy paints. Such tasks demand sequenced sanding and specialized equipment, including orbital sanders and dust-extraction systems. Experts also detect contaminants like grease, wax, or dampness that undermine adhesion despite sanding efforts.
Guidelines for Selecting and Engaging Contractors
Choosing a skilled painting contractor guarantees appropriate handling of preparation. Seek those who elaborate on sanding and priming during consultations. They ought to specify intended grit levels, adhesion testing methods, and suitable products for the surface. Insist on a detailed written proposal encompassing preparation, beyond mere application.
Confirmation of insurance and licensing safeguards against mishaps or unfinished tasks. Solicit references from comparable jobs and, where feasible, examine completed work. Trustworthy painters prioritize sanding, understanding its direct influence on project endurance.
Homeowner Preparation Steps
Assist the process by vacating spaces, protecting furnishings, and verifying electrical access for tools. Address ventilation and curing conditions upfront. Adequate air circulation promotes even drying of sealed areas. Post-sanding, contractors must vacuum or wipe surfaces prior to priming. Examine the primed layer for a texture that feels even yet tactile, not slick.
Achieving Lasting Results Through Informed Preparation
Knowledge of sanding principles empowers homeowners to guide preparation and contractor choices effectively. Investments in meticulous surface work yield savings on future fixes. Overlooking or accelerating sanding appears insignificant initially but triggers expensive peeling repairs. Professional sanding techniques foster permanent paint bonds, delivering enduring finishes that withstand time.
Common Questions
What Leads to Inadequate Paint Adhesion Following Sanding?
Inadequate sanding depth, incorrect grit selection, or overlooked dust removal impairs paint grip. Contaminants such as oils, dampness, or remnants from prior finishes further erode bonding strength.
How Can I Prepare Before the Contractor Arrives?
Dismantle wall hangings, relocate furniture, and ensure access to electrical sources and illumination. Review ventilation and drying prerequisites. Such readiness allows the team to concentrate on accurate sanding and precise application.