Sanding Shortcuts That Lead to $800 Paint Failures
Homeowners frequently overlook the importance of thorough surface preparation, which results in expensive paint issues. Proper sanding before painting walls, trim, or cabinets ensures strong adhesion and a professional appearance. Neglecting or hastening this process invites peeling, irregular surfaces, and bonding failures that demand full repaints. The expenses for labor, supplies, and corrections often surpass $800, highlighting the value of meticulous work to avert such setbacks.
The Role of Sanding in Successful Painting
Sanding extends beyond mere surface smoothing; it generates a micro-texture that promotes secure bonding of primer and paint. Without adequate abrasion, paint rests precariously atop the surface, vulnerable to chipping, bubbling, and flaking. Glossy, smooth, or previously coated areas particularly require this preparation to support new layers effectively.
Remedying paint failures from insufficient sanding demands stripping the flawed coating, thorough cleaning, and complete repainting. This process incurs substantial material losses and extended labor, escalating costs well beyond initial estimates. Investing time in sanding yields reliable, long-term protection for surfaces.
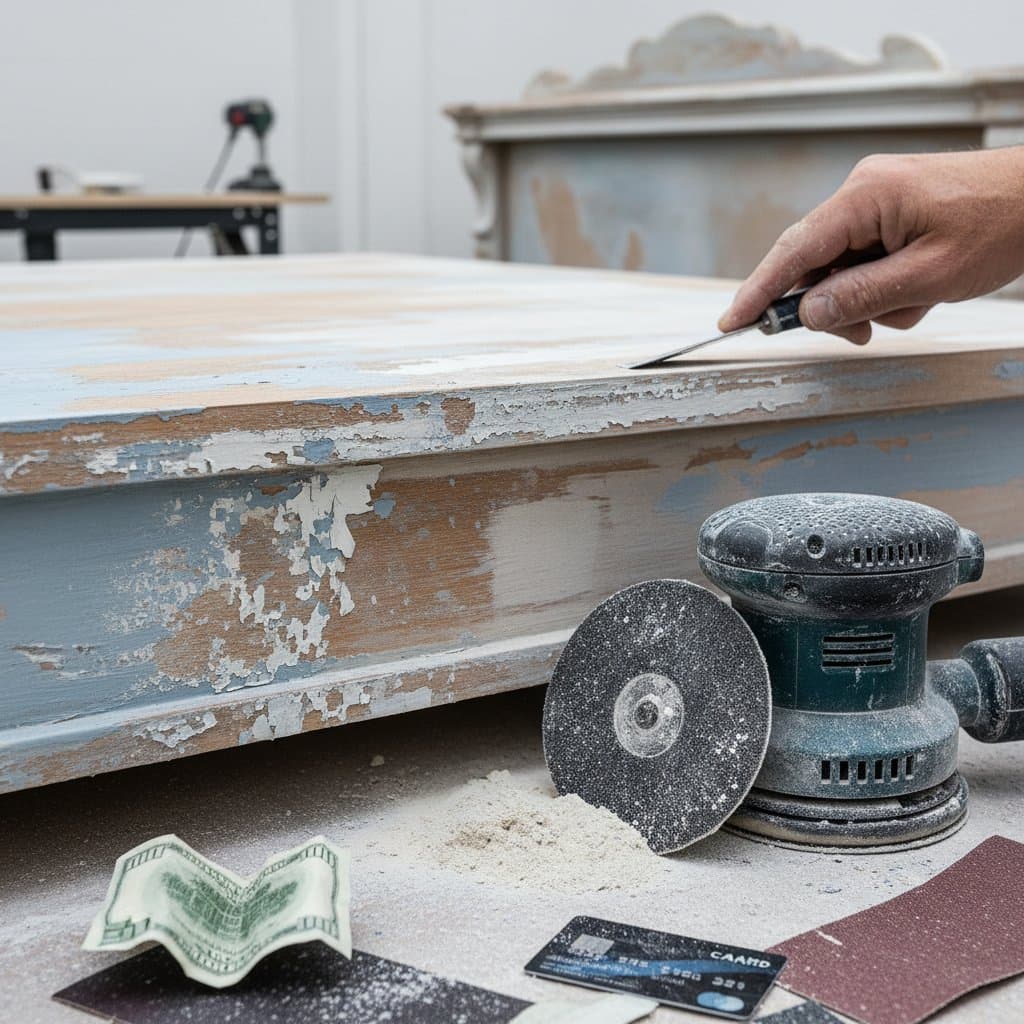
Frequent Sanding Errors and Their Consequences
1. Neglecting Initial Surface Cleaning
Sanding atop accumulated dust, grease, or residues embeds these impurities into the material. Subsequent paint applications over such contaminants risk delamination or the formation of fish-eye defects. Begin every project by cleaning surfaces with a mild detergent solution or specialized degreaser, followed by a rinse and complete drying.
2. Selecting Inappropriate Sandpaper Grit
Opting for overly fine grit results in a glossy surface that offers poor grip for paint. Conversely, excessively coarse grit produces deep scratches visible beneath thin coats. For interior walls, employ a sequence starting at 120 grit for initial roughing, progressing to 180 grit for refinement. Glossy trim or cabinets benefit from 220 grit in the final pass to achieve optimal smoothness without over-abrasion.
3. Overlooking Edges and Corners
These areas accumulate old paint flakes and dust, fostering weak spots prone to early peeling. Inconsistent treatment here undermines overall adhesion. Utilize flexible sanding sponges or angled tools to reach and abrade corners uniformly, ensuring no untreated zones remain.
4. Applying Excessive Speed During Sanding
Hurried sanding generates swirl patterns and uneven depths that emerge prominently after painting dries. These imperfections necessitate additional sanding and repainting. Maintain steady, light pressure in overlapping passes, working in sections to promote even surface profiling.
5. Overlooking Post-Sanding Dust Removal
Sanding produces fine particles that settle on all adjacent areas. Failure to eliminate this dust allows it to integrate with wet primer or paint, yielding textured blemishes and rough finishes. Vacuum thoroughly, then wipe with a slightly damp microfiber cloth or tack cloth, allowing full drying before proceeding.
How Sanding Errors Escalate to $800 Repairs
Adhesion breakdowns from inadequate sanding trigger a labor-intensive correction sequence: scraping loose material, re-sanding, priming, and repainting. For a standard room, these steps accumulate significant charges.
- Labor for removal, sanding, and repainting: $400 to $600
- Supplies including primer, paint, and equipment: $100 to $200
- Patching and surface repairs: $50 to $150
Additional factors like cleanup and disrupted schedules push totals beyond $800. Proactive preparation minimizes these risks and preserves project budgets.
Breakdown of Costs for Effective Preparation
| Step | DIY Cost Range | Professional Cost Range | Primary Benefit |
|---|---|---|---|
| Cleaning and degreasing | $10 - $30 | $50 - $100 | Eliminates barriers to paint adhesion |
| Sanding and profiling | $20 - $50 | $150 - $300 | Establishes uniform texture for bonding |
| Dust extraction and masking | $15 - $40 | $75 - $150 | Avoids contamination and protects areas |
| Primer application | $25 - $60 | $100 - $250 | Provides a stable base for topcoats |
Upfront dedication to these elements costs far less than remedial efforts. Allocate extra time for sanding and cleaning to realize substantial savings.
Variables Affecting Preparation Expenses
Material Composition: Drywall demands lighter sanding than wood or metal, which require tailored techniques. Intricate woodwork on trim or cabinets extends labor due to contours and grain patterns.
Existing Surface State: Address cracks, loose paint, or irregularities first; repairs add $50 to $200 in fillers, tools, and time.
Scope of Work: Expansive areas or multi-material jobs amplify sanding duration and supply needs.
Accessibility Challenges: Elevated surfaces, confined spaces, or ornate details necessitate specialized equipment, increasing effort.
Desired Sheen Quality: Satin or matte finishes tolerate minor imperfections, while high-gloss variants require intensive sanding between applications for flawlessness.
Techniques to Ensure Strong Paint Adhesion
Patience forms the foundation of enduring paint results. Implement this systematic approach:
- Clean all surfaces with an appropriate solution to eliminate soils and oils.
- Apply patching compound to voids or fissures, allowing full curing.
- Sand progressively: medium grit for bulk removal, fine grit for finishing touches.
- Extract dust via vacuuming and wiping with a residue-free cloth.
- Select and apply primer matched to the substrate for enhanced sealing.
- Paint in controlled layers, permitting adequate cure times between applications.
This method fosters robust bonding and vibrant, persistent color.
Choosing the Right Approach for Your Project
Evaluate your expertise, tools, and schedule when selecting DIY versus professional services. Experts offer precision, efficient dust management, and early detection of issues. While self-directed efforts reduce immediate outlays, subpar execution invites costly revisions. For complex surfaces or uncertain conditions, professional involvement delivers superior durability and value.
Frequently Asked Questions
When Should You Prepare Surfaces for Painting?
Choose periods of moderate temperatures and low humidity. These conditions facilitate thorough drying post-cleaning and uniform curing of primers and paints, minimizing moisture-related complications.
What Tools Aid Effective Sanding?
Invest in orbital sanders for large flats, detail sanders for edges, and sanding blocks for control. Pair with a shop vacuum attachment to capture dust at the source.
How Long Does Proper Sanding Take?
Allocate 1 to 2 hours per 100 square feet, depending on condition. Rushing compromises quality; methodical work prevents future expenses.


