Venetian Plaster: Achieve Professional Results and Save 30% with DIY Kits
Venetian plaster delivers a timeless, polished surface that imparts texture and depth to walls. This finish once demanded the skills of a trained artisan, positioning it among the pricier decorative wall treatments. Now, specialized DIY kits enable homeowners to replicate these effects with simplified application methods, slashing costs by up to 30 percent. Proper preparation, realistic expectations, and precise technique allow you to secure a professional appearance without the premium expense.
Project Cost Breakdown
Average Cost Ranges
- Basic DIY kit project: $150 to $300 per room
- Standard professional application: $8 to $12 per square foot
- Premium artisan finish: $15 to $25 per square foot
What's Included
DIY kits typically provide the base plaster compound, tint color, mixing tools, and trowels. Premium versions often incorporate polishing wax and specialty finishing cloths. For extensive projects, procure additional plaster or protective sealers as needed.
What Costs Extra
- Wall preparation and patching: $1 to $3 per square foot
- Specialty wax finishes or metallic pigments: $30 to $80 per container
- Protective topcoat for moisture-prone rooms: $40 to $100 per gallon
Factors That Affect Final Cost
| Factor | Cost Impact | Examples |
|---|---|---|
| Wall surface condition | Moderate | Cracked or uneven drywall extends prep time |
| Material quality | High | Premium lime-based plaster exceeds synthetic blends in price |
| Application technique | High | Multi-layer burnishing yields richer finish but demands more time |
| Kit size and coverage | Low | Larger kits reduce cost per square foot |
Understanding the Venetian Plaster Process
Venetian plaster involves applying thin layers that you smooth and polish to generate depth and subtle movement on the wall. Traditional formulations blend lime and marble dust, whereas modern kits favor acrylic-based compounds for easier handling. Allow each layer to dry completely before proceeding to the next. After polishing the final layer, apply wax or sealer to boost sheen and safeguard the surface.
Homeowners employing DIY kits must allocate time for these key phases:
- Surface preparation: Clean and smooth the wall, stripping away old paint or texture.
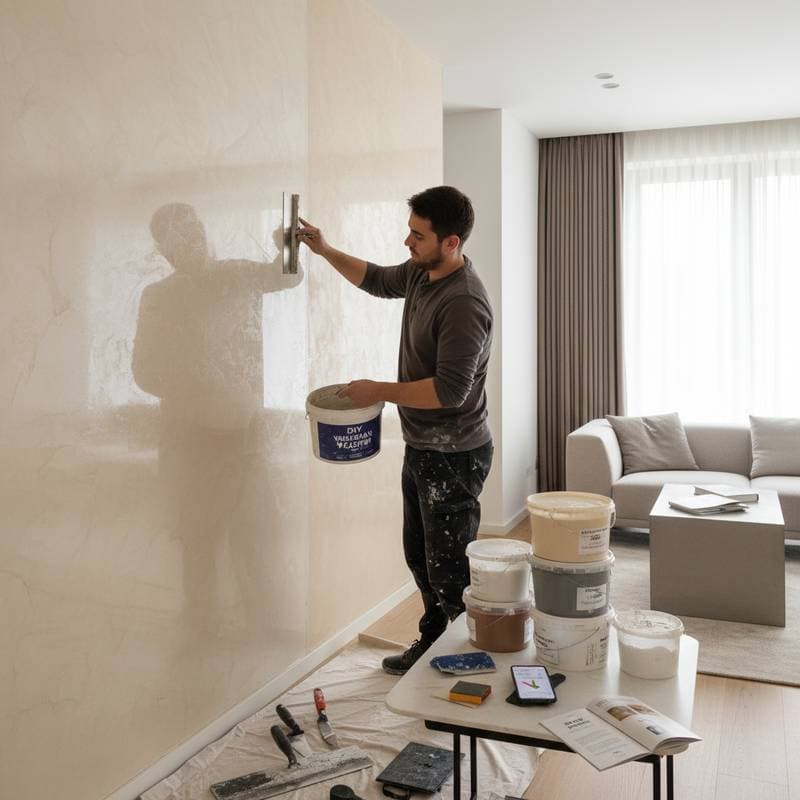
- Base coat application: Spread the first layer uniformly with a stainless steel trowel.
- Second coat and texture: Introduce a second layer to build depth, adjusting the trowel angle to form a natural pattern.
- Polishing and sealing: Burnish using the trowel edge, followed by wax or sealant application for enhanced shine and longevity.
DIY vs. Professional Application
Professionals guarantee uniform outcomes and seamless blending over expansive surfaces. Experienced contractors manage complex wall contours or ceilings with efficiency. Their proficiency frequently yields a mirror-like polish that proves elusive without extensive practice.
DIY kits suit smaller endeavors, such as accent walls or powder rooms. These kits supply detailed instructions and pre-portioned materials, empowering homeowners to manage expenses. The primary compromise involves time investment and accuracy demands. Patience proves essential, as errors become challenging to remedy after the plaster hardens.
Skill and Equipment Considerations
Venetian plaster application calls for steady hand control and proficiency with trowel strokes. Novices benefit from practicing on sample boards prior to wall work. Invest in quality tools, such as stainless steel trowels and flexible blades, to attain smooth results.
Safety and Cleanliness
Although most kits feature low-VOC materials, maintain adequate ventilation throughout. Shield floors and trim meticulously, as plaster dust solidifies rapidly. Rinse tools promptly after use to avert residue accumulation that might compromise subsequent coats.
Working with Contractors and Handymen
For vast areas or intricate finishes, many opt to engage professionals. Licensed painters or plaster experts offer precise color matching and thorough surface preparation. When evaluating bids, inquire about included materials and finish standards. Certain contractors employ genuine lime-based plasters, while others utilize synthetic alternatives that emulate the aesthetic at reduced expense.
Tips for Selecting a Professional
- Request photographs of prior Venetian plaster installations.
- Confirm licensing and insurance coverage.
- Solicit a written estimate specifying layers, materials, and finish type.
- Determine responsibility for wall preparation and cleanup.
Clear dialogue and a comprehensive contract mitigate issues related to texture, color, and sheen.
Planning Your Project
Venetian plaster undertakings necessitate patience and adaptable scheduling. Even modest rooms may span several days, accounting for drying intervals between coats. Anticipate two to three layers, plus sealing. Ambient temperature and humidity influence drying rates, introducing potential variability.
Prior to commencement, apply color samples to cardboard or scrap drywall for evaluation. Illumination alters the finish's appearance, and testing averts expensive missteps. With DIY kits, scrutinize the manufacturer's guidelines meticulously and budget additional time to master the application method.
Frequently Asked Questions
How Much Can I Save Using a DIY Venetian Plaster Kit?
DIY kits typically lower total project expenses by approximately 30 percent relative to professional services. For a small room, materials might total $200, contrasted with $800 to $1,200 for labor-intensive professional work.
How Long Does a Typical Venetian Plaster Project Take?
Allocate two to four days for homeowners, factoring in room dimensions, drying periods, and layer count. Professionals often accelerate completion through expertise and dedicated tools.
When Is It Better to Hire a Contractor Instead of Using a Kit?
Entrust large surfaces, ceilings, or spaces with elaborate trim to experts. Their capabilities ensure uniform texture and color integration, tasks that challenge novices.
What Should I Look for When Comparing Contractor Quotes?
Examine specifics on materials, layer quantity, and finish quality. Verify inclusion of wall preparation, primer, and sealing. Detailed proposals reveal potential concealed fees.
Can Venetian Plaster Be Used in Bathrooms or Kitchens?
Affirmative, provided a moisture-resistant sealer accompanies it. Lime-based plasters outperform acrylic variants in humid environments. Verify product compatibility with your setting.
What If I Make Mistakes During DIY Application?
Blend minor flaws with supplementary plaster post-drying. For significant errors, sand the area and reapply a thin coat to level the surface before final polishing.
Final Steps for Lasting Results
After completing your Venetian plaster project, inspect the surface under various lighting conditions to confirm satisfaction. Apply a final protective coat if the space encounters frequent use or moisture. Regular dusting preserves the finish, ensuring your walls retain their elegant appeal for years. This approach not only saves costs but also personalizes your home with a custom, artisanal touch.


