The $800 Sanding Mistake Every DIY Painter Makes
Sanding often becomes the overlooked phase in painting projects. Many individuals select their desired color, prepare their brushes, and eagerly apply the initial layer without adequate preparation. However, this oversight frequently results in substantial financial loss and additional labor. The critical error involves neglecting or improperly executing sanding, which this article addresses to prevent such occurrences.
Importance of Sanding in Paint Adhesion
The durability of paint depends entirely on the underlying surface quality. Without proper sanding, superior primers and topcoats may still develop bubbles, peel away, or exhibit inconsistencies. Sanding serves as the foundational process that prepares the surface for optimal paint bonding. Individuals seeking a smooth, professional-grade finish that endures over time must prioritize this step.
Professionals frequently encounter situations where homeowners proceed directly to painting, only to face rapid deterioration. The remedy often requires complete paint removal and reapplication, incurring costs exceeding $800 in supplies and professional services. Investing a few hours in sanding eliminates the need for such extensive corrections.
Three Essential Sanding Approaches
Achieving professional results requires neither advanced equipment nor significant expenditure, but rather a structured technique and appropriate grit progression.
1. Light Preparation for Existing Painted Surfaces
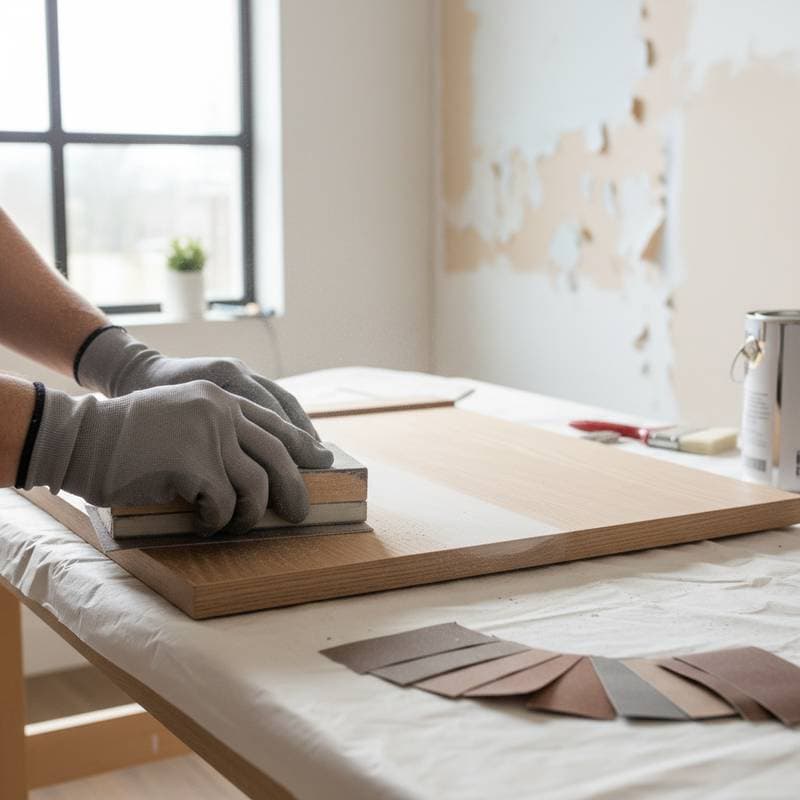
For walls or trim already coated in paint and maintaining good condition, a brief scuff sanding suffices. Employ fine-grit sandpaper, such as 220 grit. The objective involves dulling the existing gloss to promote adhesion without full removal of the prior layer. Subsequently, eliminate dust using a damp cloth before applying primer.
2. Medium Preparation for Glossy or Imperfect Surfaces
High-gloss areas or minor irregularities demand a medium grit, such as 150, followed by progression to 220 grit for refinement. This sequential method smooths elevations and enhances paint grip. Such preparation proves ideal for frequently used cabinets or trim.
3. Heavy Preparation for Unfinished Wood or Damaged Areas
Raw wood or flaking paint necessitates beginning with coarse grit, like 80 or 100. Advance progressively through 150 grit and conclude at 220 grit. This graduated process yields a uniform base that prevents uneven paint absorption.
Cost-Effective Sanding Options
Effective sanding aligns with various financial constraints, allowing savings across budgets.
Low Budget (Under $50):
Acquire a sanding block, assorted grit sheets, and a microfiber cloth. Manual effort provides reliable outcomes for modest tasks. This approach suits small-scale endeavors or rental properties where minimal investment is preferable.
Mid Budget ($50-$200):
Purchase an orbital sander to accelerate the process and ensure uniform application. Incorporate a shop vacuum attachment to manage dust effectively. These enhancements reduce labor time and promote superior surface evenness.
Higher Budget ($200+):
For extensive surfaces, opt for a dustless sanding system that extracts particles during operation. Such equipment maintains air quality and minimizes post-task cleanup. Professionals favor these systems for their protective benefits to health and finish integrity.
Common Errors Leading to High Costs
Several frequent missteps contribute to repair expenses reaching $800. Addressing these prevents project failure.
- Omitting Sanding Altogether: Inadequate adhesion causes peeling or bubbling over time.
- Selecting Inappropriate Grit: Excessive coarseness damages the surface, while insufficient abrasiveness hinders bonding.
- Failing to Clean Post-Sanding: Residual dust creates barriers that disrupt even paint application.
- Applying Uneven Pressure: Over-sanding specific zones leads to visible textural variations after coating.
- Neglecting Safety Measures: Inhaling dust poses health hazards and compromises the final result.
Steering clear of these issues ensures outcomes comparable to professional work.
Assessing Surface Readiness
A straightforward evaluation confirms preparation adequacy. Pass your hand across the surface under ample illumination to detect uniformity and absence of gloss or protrusions. Next, apply a clean, damp cloth; even water dispersion without beading indicates suitability for priming.
Techniques Tailored to Experience Levels
Beginner Guidance:
Maintain light, consistent strokes during sanding. Allow the abrasive material to perform the task without excessive force, which might produce indentations. Follow the wood grain direction for linear surfaces and employ circular patterns on walls.
Intermediate Strategies:
Implement feather sanding to integrate repairs seamlessly. Commence with medium grit on filled areas, then taper edges using finer grit to eliminate perceptible boundaries.
Advanced Methods:
Apply a sanding sealer to wood prior to painting for balanced absorption and effortless application. This technique proves invaluable for furniture restoration and detailed cabinetry, yielding impeccable results that withstand scrutiny.
Lessons from Professional Production Environments
Experience in television set preparation underscores the visibility of subpar preparation under intense lighting. Imperfections such as textures or inconsistencies become immediately apparent. Professionals therefore emphasize efficient, methodical sanding, inspecting under bright conditions and proceeding section by section from top to bottom.
Adopt similar practices at home for comparable precision. Additionally, utilize tinted primer aligned with the final color to identify coverage gaps, thereby minimizing additional layers and associated expenses.
Indicators for Professional Assistance
Complex scenarios, including multiple paint layers, potential lead content, or ornate woodwork, warrant expert intervention. Specialists possess specialized equipment to preserve details while safely eliminating accumulations. Although sanding demands physical effort, professionals achieve expedited, pristine outcomes on large-scale projects. View this as an investment in long-term aesthetic and structural quality.
Maintenance of Tools and Work Areas
Conclude sanding sessions with thorough cleanup. Vacuum surfaces, employ a tack cloth or damp rag for residue removal, and rinse equipment. Store sanding blocks horizontally to preserve form. For powered devices, promptly dispose of collected dust to facilitate future use.
Benefits of Proper Preparation in Daily Use
Upon drying, the painted surface reflects the value of meticulous sanding through enhanced smoothness, vibrancy, and tactile refinement. Such preparation reduces susceptibility to chips and abrasions, as the paint integrates securely with the substrate.
For preservation, regularly dust with a soft cloth and eschew abrasive cleaners that diminish luster. Future repaints require only light scuffing, simplifying maintenance.
Essential Strategies for Optimal Results
- Test the grit sequence on an inconspicuous area to verify compatibility.
- Illuminate the workspace brightly and shift viewing angles to identify flaws.
- Renew sandpaper frequently, as dulling leads to ineffective polishing rather than abrasion.
- Ensure ventilation while containing dust.
- Allocate sufficient time to preparation, viewing sanding as protection against premature deterioration.
Appreciate the achievements, value the methodology, and recognize that superior painting originates in comprehensive groundwork. Approach sanding methodically, and observe how illumination accentuates the excellence of a meticulously prepared surface.


