The Costly Consequences of Inadequate Sanding in Paint Jobs
Every professional painter encounters the frustration of a newly painted surface that begins to peel shortly after application. This issue frequently stems from inadequate sanding during preparation. Proper sanding distinguishes a durable finish from one requiring an $800 correction. Experience from set constructions, client assignments, and routine updates highlights how incorrect grit selection or insufficient preparation can undermine even the highest-quality paint.
The Essential Role of Sanding in Paint Adhesion
Sanding extends beyond mere surface smoothing; it establishes a mechanical bond for paint. Paint adheres best to a subtly textured surface that provides grip. Without this texture, premium paints fail to hold, similar to applying coating over untreated ice. For instance, painting glossy trim without prior scuffing results in initial appeal followed by rapid peeling.
Correct sanding forms a secure connection between the existing surface and the new layer. This preparation applies to kitchen cabinets, drywall, or exterior siding, acting as the foundational agreement for longevity.
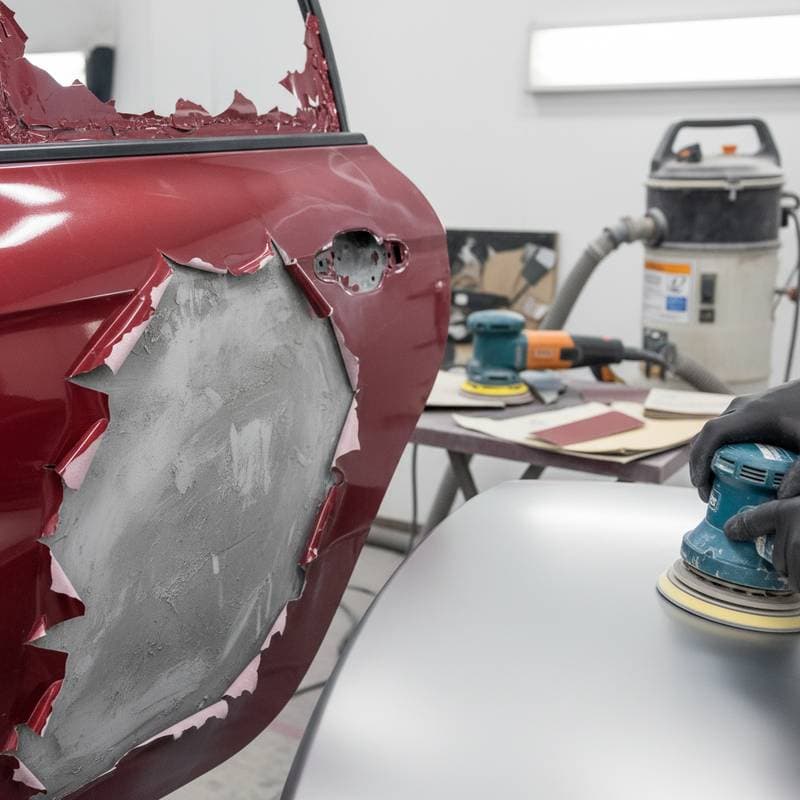
Three Tiers of Sanding Approaches for Every Budget
Effective surface preparation accommodates various levels of investment and time commitment.
1. Basic Manual Method
Use a sanding block with high-quality abrasive paper. Begin with 120-grit for initial smoothing, then progress to 180- or 220-grit for a paint-ready finish. Apply even, light pressure throughout. This approach suits small-scale tasks or rental properties where minimal tools suffice.
2. Powered Efficiency Option
An orbital sander delivers uniform results and reduces effort. Attach hook-and-loop discs and maintain gentle operation to prevent swirl marks or material damage. Incorporate a vacuum attachment to minimize airborne dust, promoting a cleaner workspace and superior surface quality.
3. Professional-Grade Equipment
For extensive areas, employ dust-extraction sanders or comprehensive preparation systems. These tools accelerate the process, ensure consistent pressure, and simplify cleanup. Such investments prove worthwhile for frequent painters or commercial operations, eliminating time lost to adhesion failures.
Understanding Surface Preparation for Different Materials
Various substrates demand tailored sanding strategies due to their unique properties. Wood benefits from sanding that exposes the grain for even absorption of stains or paints. Drywall requires leveling of joint compound to eliminate ridges. Metal surfaces need removal of oxidation and roughening of factory finishes to secure primer.
Follow this material-specific guide:
- Wood: Initiate with 120-grit, conclude at 180-220 grit
- Drywall: Employ 150-grit progressing to 220-grit
- Metal: Use 80-120 grit prior to priming
After sanding, clean the surface with a tack cloth or damp microfiber towel. Residual dust impairs adhesion and leads to bubbling. Inspect under bright lighting; if gloss persists, perform additional light sanding.
A Real-World Example of the $800 Sanding Oversight
Consider a homeowner commissioning a kitchen cabinet repaint with an attractive color and professional spray application. The preparation team deems the surface sufficiently smooth and omits sanding. Soon after, doors adhere improperly, paint flakes at edges, and the finish develops a tacky texture. Remediation involves stripping, sanding, priming, and repainting, accumulating significant labor and material costs.
The root cause lies in the glossy polyurethane finish obstructing adhesion. A straightforward pass with 220-grit abrasive would have created the necessary profile. Professionals advise that if a surface reflects light clearly, it requires scuffing to accept new paint.
Proven Techniques from Professional Practice
Extensive experience in high-visibility environments underscores the importance of meticulous surface inspection. Subtle imperfections become evident under scrutiny, informing standards for all projects.
Adopt these field-tested practices:
- Inspect in Natural Lighting
Position light sources to cast shadows, revealing inconsistencies from various perspectives. - Apply Minimal Pressure
Allow the abrasive to perform the work; excessive force creates depressions visible after painting. - Replace Abrasives Frequently
Worn paper fails to cut effectively, leading to polishing rather than profiling. Maintain sharpness for reliable outcomes. - Evaluate by Touch
Run fingertips over the surface with eyes closed to detect irregularities overlooked visually. - Conclude with Thorough Cleaning
Vacuum debris, then wipe with denatured alcohol or a tack cloth. Avoid painting over any particulate matter.
Correcting Frequent Sanding Errors
Errors occur, yet most yield to straightforward remedies.
- Visible Scratches Beneath Paint
Coarse abrasives leave traces; refine with 220-grit and reapply primer. - Inconsistent Sheen Variations
Uneven sanding causes this; lightly resand, clean, and prime uniformly. - Adhesion Failures Like Peeling or Bubbling
Dust or gloss residues contribute; scrape affected areas, sand smooth, clean meticulously, and repaint. - Edge Damage from Over-Sanding
Power tools accelerate this; protect edges with guards or manual methods.
These corrections demonstrate that attentive refinement transforms potential setbacks into opportunities for excellence.
Strategic Preparation for Business Sustainability
Thorough preparation represents both skill and fiscal prudence. Each hour invested in sanding averts multiple hours in revisions and client dissatisfaction. Durability fosters positive feedback and repeat business over transient aesthetics.
For painting enterprises, standardize preparation protocols. Equip teams with grit reference charts and enforce pre-priming inspections. Consistent processes elevate from occasional services to reliable partnerships.
Maintaining Long-Term Finish Integrity
A well-sanded and painted surface withstands routine use with simple care. Clean periodically with mild soap solutions, steering clear of harsh abrasives, and address minor damages promptly. The established bond resists humidity, impacts, and abrasion effectively.
When exploring new finishes, conduct trials on inconspicuous areas. Experiment with grit variations to observe effects on final appearance. This methodical approach builds assurance in achieving optimal readiness for painting.


