Prevent $8,000 in Paint Damage Through Vapor Barrier Preparation
Painting the interior or exterior of a home involves more than applying color to surfaces. Trapped moisture behind walls or beneath floors can compromise the strongest finishes, resulting in bubbles, flaking layers, and extensive repairs that drain budgets. Homeowners frequently discover the consequences only after damage appears, but vapor barrier preparation shields both the building structure and the paint application, conserving resources and effort.
The Function of Vapor Barriers in Painting Projects
Vapor barriers consist of materials designed to restrict the passage of moisture through walls, ceilings, and floors. During painting, these barriers block vapor from penetrating wall assemblies, where it might condense and undermine paint adhesion. Accumulated moisture exerts pressure on the paint surface, leading to blisters, fractures, and fading.
Requirements for vapor barriers vary by geographic location, insulation materials, and ambient humidity. Spaces like bathrooms, kitchens, and basements demand heightened focus due to ongoing shifts in temperature and moisture. Absent appropriate barriers, superior primers and paints deteriorate ahead of schedule, exposing surfaces to further harm.
In humid climates, such as coastal regions, vapor barriers often integrate with insulation to direct moisture outward, preventing internal buildup. For colder areas, they help avoid condensation within wall cavities during heating seasons. Selecting the correct type, whether polyethylene sheets or permeable membranes, ensures compatibility with local conditions and building materials.
Project Cost Analysis
Typical Cost Categories
- Basic scope: $2,000 to $3,500, covering standard surfaces with minimal preparation.
- Mid-range scope: $3,500 to $6,000, including moderate repairs and barrier enhancements.
- Advanced scope: $6,000 to $8,000 or higher, for complex installations in moisture-heavy zones.
Core Components of the Project
- Thorough examination of surfaces and moisture detection.
- Installation or enhancement of vapor barriers.
- Remediation of wall imperfections and primer layers.
- Application of durable paints followed by thorough site restoration.
Additional Expenses
- Mold removal efforts: $500 to $1,500, depending on infestation scale.
- Fixes for water-induced structural issues: $1,000 to $3,000, addressing rot or warping.
- Advanced protective coatings or moisture-resistant systems: $300 to $800, for high-risk areas.
Influences on Total Expenses
| Factor | Influence on Cost | Specific Instances |
|---|---|---|
| Surface Integrity | Rises with deterioration | Fractured plaster or decayed timber |
| Moisture Presence | Elevates preparation demands | Elevated humidity in lower levels |
| Material Selection | Varies by grade | Basic plastic films versus advanced sealants |
| Project Scale | Scales linearly | Full residence versus isolated room |
Labor rates in urban settings can increase costs by 20 to 30 percent compared to rural areas. Material prices fluctuate with market conditions, so obtaining multiple quotes helps establish a realistic budget.
The Importance of Moisture Management in Painting
Moisture penetration initiates paint degradation out of sight. Condensation within walls or above ceilings erodes drywall integrity and destabilizes primer bonds. Gradually, the paint surface develops blisters and detaches, revealing vulnerable substrates beneath.
Repainting without resolving the root moisture problem guarantees recurring issues. In severe cases, unchecked vapor leads to mold growth, compromising indoor air quality and requiring comprehensive remediation. Early intervention through barriers maintains not only aesthetics but also the home's overall health.
Professional Services Versus DIY Efforts
Engaging Experts
Certified contractors or painting professionals represent the reliable option for the majority of projects. They employ tools like digital moisture meters and thermal imaging devices to pinpoint vapor sources. Knowledge of regional codes enables them to integrate barriers seamlessly with existing insulation and structural elements.
Professionals also select products tested for vapor resistance, such as low-permeability paints suited to specific environments. Their systematic approach minimizes errors, ensuring barriers function effectively over decades.
DIY Considerations
Experienced individuals familiar with finishing tasks might manage limited repairs, like sealing a single wall section or refreshing a damp-prone area. Essential supplies include moisture test kits and basic sealants available at hardware stores.
However, amateur efforts frequently overlook concealed vapor paths or inadequate sealing. Without calibrated tools, assessments prove inaccurate, leading to incomplete protection. Such oversights often result in escalated repair needs, surpassing initial savings.
Step-by-Step Vapor Barrier Preparation
-
Conduct Moisture Evaluation
Experts examine walls, ceilings, and floors using detection instruments to locate high-risk zones. This phase identifies leaks, condensation patterns, and humidity gradients. -
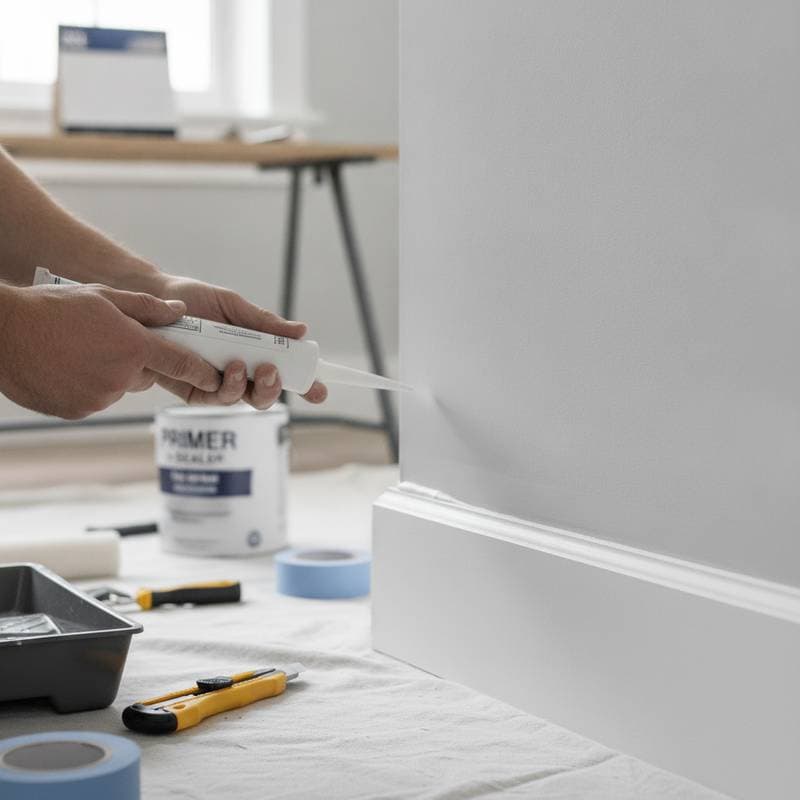
Address Surface Imperfections
Replace or fortify compromised drywall, plaster, or lumber prior to painting. Seal cracks and joints to form a continuous protective layer. -
Install the Barrier System
Apply sheets, membranes, or vapor-retarding primers to control moisture flow. Position barriers on the warm side of insulation for optimal performance. -
Apply Primer and Finish Coats
Select primers that enhance adhesion in moist conditions, followed by paints formulated for durability. Allow sufficient curing time between layers. -
Perform Final Verification and Restoration
Inspect for uniform coverage and barrier efficacy. Complete minor adjustments and restore the workspace to its original state.
Each step builds upon the previous, creating a robust defense against moisture. Timing matters; for instance, barriers require 24 to 48 hours to set before priming.
Strategies for Project Planning
Begin by assessing your home's moisture vulnerabilities through a walkthrough, noting areas with poor ventilation or past water exposure. Consult local climate data to determine barrier specifications, such as Class I for high-humidity zones.
Develop a timeline that accounts for drying periods and potential disruptions. Budget for contingencies like unexpected repairs, allocating 10 to 15 percent extra. Secure at least three contractor bids, prioritizing those with certifications in moisture control.
Coordinate with other home improvements, such as insulation upgrades, to maximize efficiency. Document the process with photos for warranty purposes and future reference.
Common Inquiries
How Does Vapor Barrier Preparation Impact Painting Costs?
Vapor barrier work typically adds $1 to $3 per square foot, influenced by surface state and barrier variety. This upfront expense averts failures that could exceed $8,000 in corrections, proving essential in susceptible environments.
What Is the Duration of Preparation and Painting?
Standard home projects span one to two weeks, encompassing evaluation, preparation, and curing intervals. Extensive properties or those with significant damage extend timelines, particularly during mold treatment.
Is High-Quality Paint Sufficient Without Barrier Prep?
Premium paints enhance resistance but fail against persistent moisture. Vapor must be managed at the source to prevent subsurface accumulation and surface breakdown.
How to Select a Reliable Contractor?
Seek licensed professionals experienced in moisture mitigation. Request client testimonials, liability coverage verification, and detailed proposals outlining preparation, supplies, and checks. Steer clear of those minimizing testing phases.
Indicators of Ineffective Barrier Installation?
Flaking paint, persistent odors, or staining near edges signal moisture entrapment. Immediate evaluation halts progression to structural compromise.
Maintenance Tips for Ongoing Protection?
Regulate indoor humidity below 50 percent, promote airflow in wet areas, and inspect finishes quarterly. Swiftly resolve drips or fogging to sustain barrier effectiveness.
Secure Long-Term Home Protection
Investing in vapor barrier preparation transforms painting from a temporary enhancement into a enduring safeguard. Homeowners gain confidence in surfaces that withstand environmental stresses, avoiding the financial and emotional toll of repairs. By prioritizing moisture control, properties retain value and comfort for years ahead.