Venetian Plaster Revival: DIY or Pro for 2026 Trends?
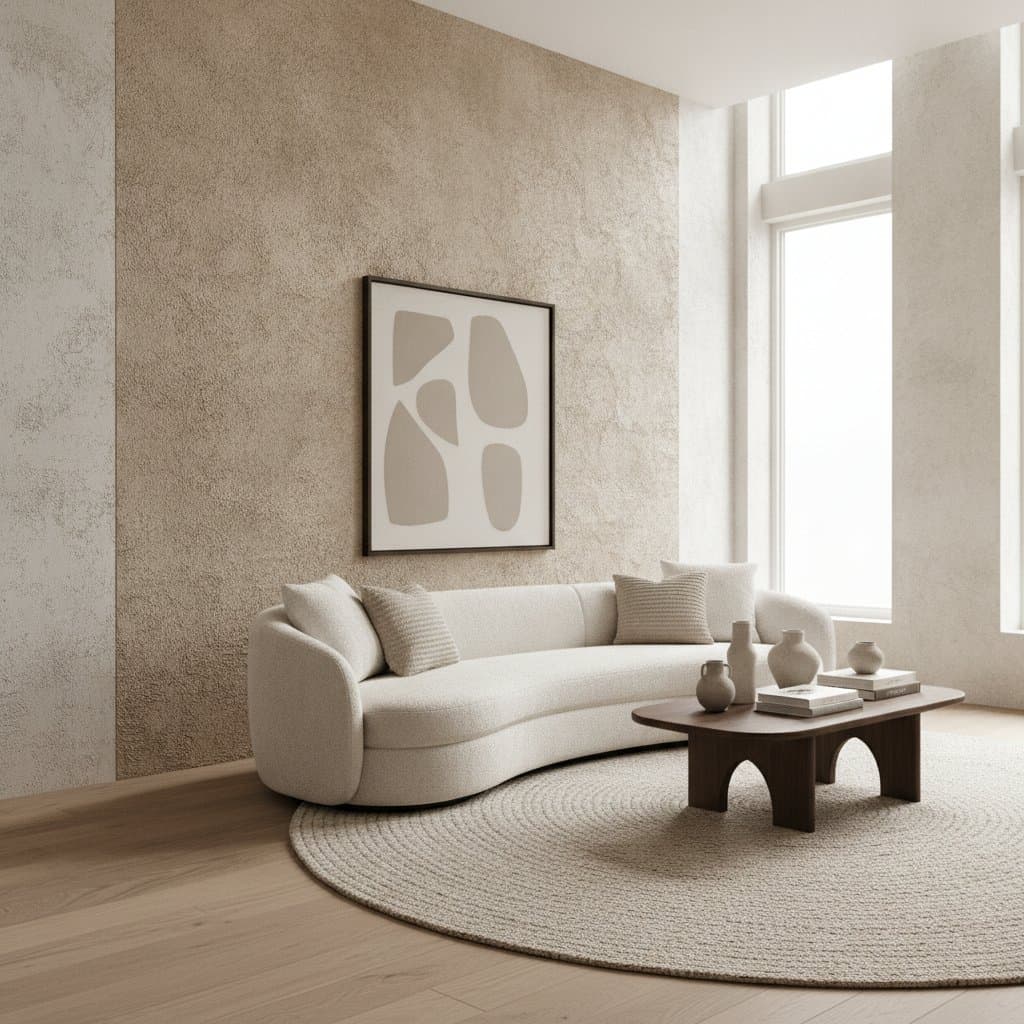
Venetian plaster is making a strong comeback in home design. Homeowners are rediscovering its smooth, stone-like finish, subtle texture, and ability to add depth to walls that standard paint cannot achieve. This ancient technique, once reserved for grand European architecture, is finding new life in modern spaces. Whether used to enhance accent walls or bring elegance to entire rooms, Venetian plaster offers a timeless look that complements both contemporary and classic interiors.
As this decorative finish gains attention, many homeowners are faced with a familiar question: should they attempt it themselves or bring in a professional? The answer depends on skill, patience, and budget, but understanding the process and costs helps make the decision clear.
What Venetian Plaster Involves
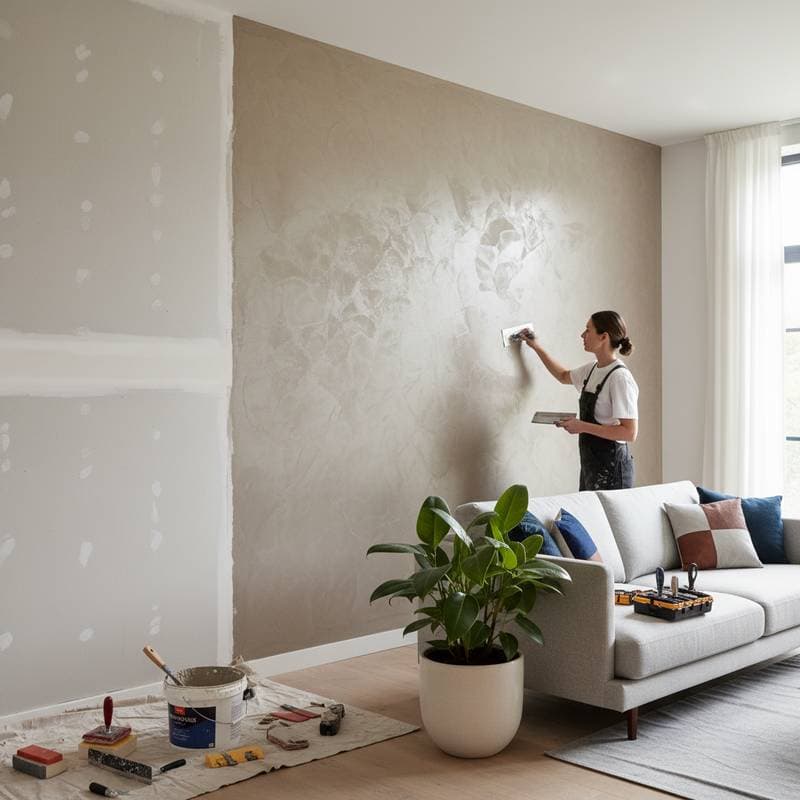
Venetian plaster is not just a coating. It is a layered finish made from lime, marble dust, and pigment. When applied correctly, it creates a surface that reflects light while maintaining a soft, tactile texture. The process involves multiple thin coats followed by polishing or burnishing to achieve a smooth, glossy effect.
The materials are eco-friendly and breathable, which helps regulate humidity and resist mold. These qualities make Venetian plaster ideal for living rooms, bathrooms, and entryways. However, the technique demands precision. Each layer must be applied with consistent pressure and timing to prevent uneven texture or color streaks.
Project Cost Breakdown
Average Cost Ranges
- Basic project: $8 - $12 per square foot
- Standard project: $13 - $20 per square foot
- Premium project: $21 - $35 per square foot
What's Included
- Surface preparation and minor wall repairs
- Base coat and multiple plaster layers
- Burnishing and polishing for sheen
- Protective topcoat for durability
What Costs Extra
- Custom pigments or metallic finishes: $2 - $5 per square foot
- Complex wall shapes or high ceilings: $3 - $6 per square foot
- Specialty sealers or waterproofing: $1 - $3 per square foot
Factors That Affect Final Cost
| Factor | Cost Impact | Examples |
|---|---|---|
| Material quality | Increases with premium lime or marble content | Authentic lime plaster from Italy often costs more |
| Wall condition | Adds prep cost | Cracks, uneven surfaces, or old paint removal |
| Skill level | Influences labor rate | Experienced artisans charge more for precision |
| Finish type | Adjusts total cost | Polished, matte, or metallic finishes vary in time and materials |
| Room size | Alters efficiency | Smaller spaces have higher cost per square foot due to setup time |
What Makes Venetian Plaster Unique
Unlike regular paint or textured coatings, Venetian plaster becomes part of the wall. Its mineral composition reacts with carbon dioxide in the air, hardening over time and creating a surface that resists fading. The finish can be tinted in soft neutrals or bold tones, giving designers endless flexibility. Many homeowners appreciate how it changes appearance throughout the day as light moves across the surface.
Another advantage is longevity. With proper care, Venetian plaster can last decades without needing repainting. It can be refreshed by light buffing or applying a thin maintenance coat, which makes it an appealing long-term investment.
DIY Venetian Plaster: What to Expect
Attempting Venetian plaster as a DIY project can be rewarding but challenging. It requires patience and a steady hand. The process involves applying thin layers with a trowel, allowing each to dry partially, then polishing to create depth and shine.
Skill Requirements
- Experience with joint compound or decorative finishes is helpful
- Ability to follow precise timing between coats
- Comfort with tools like steel trowels and burnishing blades
Time Commitment
A small room might take several days to complete, including drying time between layers. Each coat must cure properly before the next is added. Rushing leads to uneven surfaces or trapped moisture that can cause peeling.
Tools and Material Costs
DIY kits range from $100 to $300 for materials, while professional-grade products can exceed $500. Specialized trowels cost $30 to $100 depending on quality. Renting scaffolding or drop cloths adds to the budget.
Safety and Quality Considerations
Lime-based plasters are alkaline, so gloves and goggles are necessary. Ventilation also matters since polishing can release fine dust. Achieving a smooth, consistent finish takes practice, and mistakes are difficult to correct without sanding and reapplying multiple layers.
Professional Application: Why It Matters
Hiring a professional ensures consistency and artistry. Skilled plasterers understand how environmental factors like humidity and temperature influence drying and texture. They are trained to blend pigments evenly and handle complex wall shapes. Professionals also bring specialized tools and experience that reduce material waste and project time.
Benefits of Hiring a Pro
- Flawless finish: Even texture and color throughout
- Durability: Proper curing extends the life of the plaster
- Efficiency: Faster completion with less trial and error
- Warranty protection: Many contractors guarantee their work
Typical Project Timeline
- Consultation and sampling: 1 day
- Wall preparation: 1 to 2 days
- Application of base and finish coats: 2 to 4 days
- Polishing and sealing: 1 day
Complex finishes or large areas may take longer, but professional crews often complete a standard room within a week.
Comparing DIY and Professional Costs
While DIY may appear more affordable, the savings are not always substantial once tools, materials, and potential corrections are considered.
| Approach | Estimated Total Cost | Pros | Cons |
|---|---|---|---|
| DIY | $3 - $8 per square foot | Lower labor expense, creative control | Steeper learning curve, inconsistent results |
| Professional | $8 - $35 per square foot | Quality assurance, durability, time savings | Higher upfront cost |
For accent walls or small projects, a confident DIYer can produce good results. For full-room applications, curved walls, or high-end finishes, professional work delivers better long-term value.
Preparing for Your Venetian Plaster Project
Preparation Steps
- Inspect the surface for cracks or uneven spots.
- Clean and prime the walls to ensure proper adhesion.
- Decide on finish type, such as matte, satin, or polished.
- Confirm ventilation to help curing and reduce odor.
- Protect adjacent surfaces with painter’s tape and coverings.
Making the Right Choice
Venetian plaster appeals to homeowners seeking elegance and durability. While the DIY route can work for small decorative areas, professional application yields the most refined results. The tactile finish, natural composition, and timeless beauty justify the investment for many homes.
Frequently Asked Questions
1. How much does Venetian plaster cost for an average room?
For a medium-sized room, expect professional costs between $2,000 and $6,000 depending on material quality and finish type. Simple matte finishes cost less, while polished or metallic options increase the price. DIY materials for the same space might total around $400 to $800, excluding tools and preparation supplies.
2. How long does a Venetian plaster project take?
Professional projects typically take five to seven days from preparation to polishing. DIY timelines vary widely, often extending to two weeks due to drying time and smaller-scale work sessions. Humidity, temperature, and surface condition can affect drying speed.
3. Is Venetian plaster suitable for bathrooms or kitchens?
Yes, when properly sealed, Venetian plaster performs well in moisture-prone areas. Applying a breathable protective wax or sealer helps resist stains and make cleaning easier. Professional installers often recommend specific sealers for high-humidity spaces.
4. What should I look for when hiring a Venetian plaster contractor?
Ask for proof of insurance, references, and a portfolio of completed projects. Request a written estimate that includes material type, number of coats, and finishing method. A reputable contractor will explain each step and offer sample panels before beginning work.
5. Can I repair Venetian plaster myself if it gets damaged?
Small scratches or scuffs can often be polished out with fine sandpaper or buffing pads. Larger cracks or chips require reapplication of plaster layers, which may be best handled by a professional to maintain color and texture consistency.
6. What maintenance does Venetian plaster need over time?
Routine care involves dusting with a dry cloth and avoiding harsh cleaners. Every few years, a light polish or wax coat can refresh the sheen. With proper maintenance, a well-applied Venetian plaster surface remains beautiful for decades, maintaining its depth, texture, and distinctive glow.