The Top Sanding Mistakes That Ruin Paint Jobs in 2025
A blotchy or uneven paint finish often originates from inadequate sanding during preparation. This essential step determines the smoothness, adhesion, and durability of the paint. Professionals encounter these issues frequently across various projects. The following outlines common sanding errors and provides practical solutions to achieve professional results.
Mistake 1: Skipping Sanding Altogether
Many assume that primer or thick paint layers conceal surface imperfections, yet paint tends to accentuate them. Without sanding, irregularities such as bumps, brush marks, or glossy areas remain, hindering adhesion. Even pre-finished trim or primed boards require a light scuffing to promote grip.
Fix it: Sand every surface prior to painting, even lightly. For smooth areas, use 220-grit sandpaper for a brief pass to create texture for paint adhesion. On raw wood, begin with 120-grit and progress to 180-grit for an optimal base. Proper preparation yields superior outcomes.
Mistake 2: Using the Wrong Grit
Selecting inappropriate grit leads to visible scratches or insufficient adhesion. Coarse grits create deep marks that bleed through paint layers, while overly fine grits result in a surface too smooth for proper bonding. A rushed application of 60-grit on a door, for instance, may appear acceptable initially but reveals scratches upon drying.
Fix it: Progress through grits systematically, starting coarse only for removal tasks and advancing to finer options. Follow this guide:
- Heavy sanding or stripping: 60 to 80 grit
- General smoothing: 100 to 150 grit
- Pre-paint scuffing: 180 to 220 grit
Match the final grit to the paint finish; smoother preparation suits gloss paints, which reveal flaws more readily, while matte finishes tolerate minor texture.
Mistake 3: Applying Uneven Pressure
Excessive pressure during sanding produces dips and shiny spots, whereas insufficient pressure leaves areas untouched and glossy. Consistent technique prevents these inconsistencies. Novices often apply force akin to scrubbing, which can penetrate primer layers.
Fix it: Apply light, uniform pressure and use overlapping strokes, allowing the abrasive to perform the task. With power sanders, maintain constant motion to avoid localized deepening. Sand corners manually for precision, and assess smoothness by gliding a hand over the surface.
Mistake 4: Ignoring Dust Between Grits
Sanding dust accumulates in crevices and reattaches to cleaned areas, contaminating subsequent steps. Painting over residue integrates it into the finish, causing rough textures or adhesion failures. Under magnification, these appear as small imperfections.
Fix it: After each sanding phase, clean with a tack cloth or damp microfiber towel. Vacuum detailed areas and use compressed air for grooves in cabinetry or furniture. A dust-free surface ensures the next grit works effectively without embedding debris.
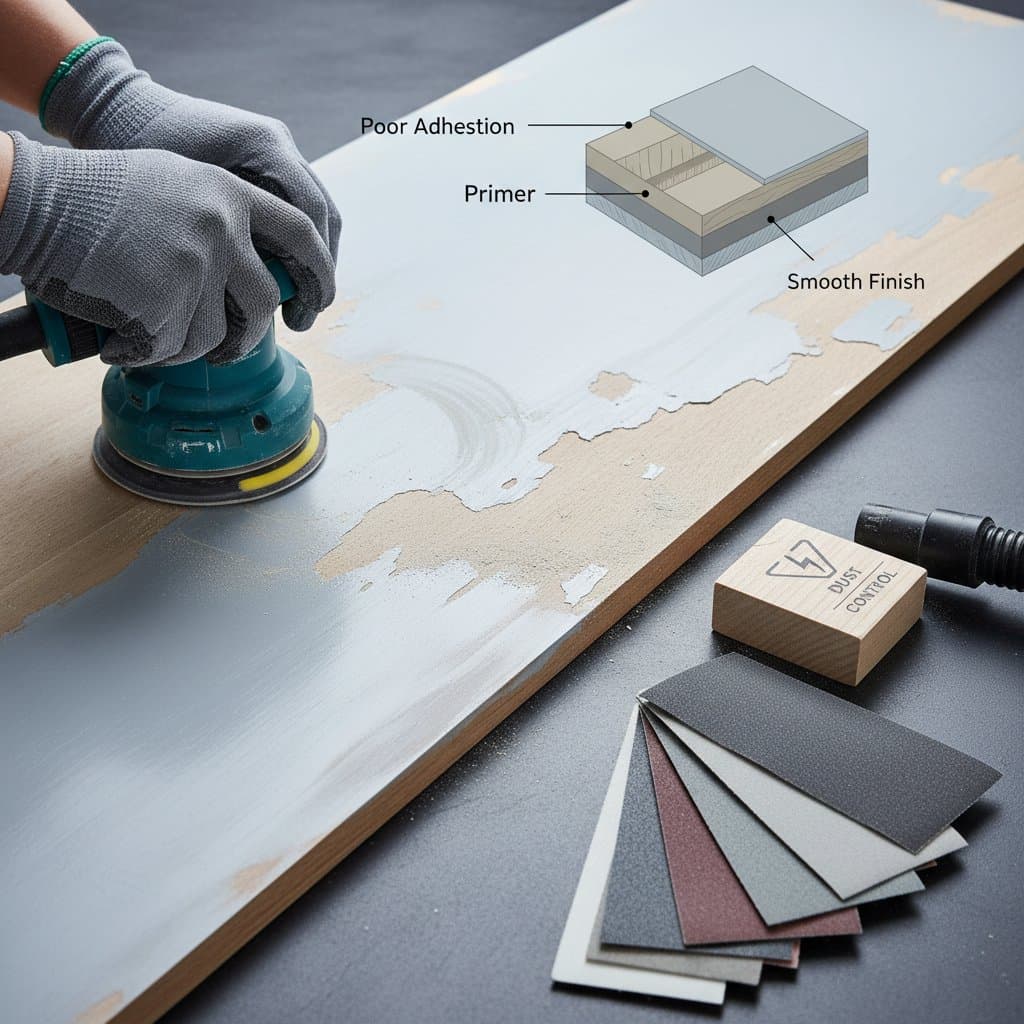
Mistake 5: Skipping Sanding After Primer
Primer serves as an intermediary layer, but it frequently raises wood grain or develops a powdery surface. Omitting sanding post-priming results in uneven topcoats and bonding issues, manifesting as dull patches.
Fix it: Lightly sand dried primer with 220-grit paper to reduce roughness without removal. Clean thoroughly afterward before applying the topcoat. This process elevates the overall quality to professional standards.
Mistake 6: Failing to Test the Surface
Materials like metal, laminate, and veneer respond differently to sanding. Aggressive sanding on laminate risks penetrating the decorative layer, while improper metal sanding produces swirls that paint highlights.
Fix it: Test sanding on an inconspicuous area to observe material behavior. Adjust grit or switch to a sanding sponge if scratching occurs excessively or paper clogs. Experience helps distinguish between effective removal and unintended damage.
Mistake 7: Neglecting Edges and Corners
Edges often receive inadequate or excessive attention, leading to glossy streaks prone to peeling or rounded details exposing underlying material. Both compromise the finish's crispness.
Fix it: Fold sandpaper for even edge coverage and alternate stroke directions. Employ flexible sanding sponges for contours in molding or trim. Inspect under angled lighting to confirm uniform reflectivity before painting.
Mistake 8: Using Worn-Out Sandpaper
Dull sandpaper fails to abrade effectively, generating heat that glazes surfaces, particularly synthetics, and results in uneven sheen and adhesion problems.
Fix it: Discard sandpaper that clogs, tears, or loses effectiveness. Maintain a supply of fresh sheets per grit and organize them by stage for large projects. Fresh abrasives enhance efficiency and reduce errors.
Mistake 9: Overlooking Safety and Ventilation
Sanding produces fine dust that irritates respiratory, ocular, and dermal systems. Older finishes may release hazardous substances like lead. Dust management remains a priority in professional environments.
Fix it: Wear a respirator rated for fine particles, along with goggles and gloves, especially for overhead work or legacy materials. Ensure ventilation through fans or open windows, and use HEPA-filtered vacuums for cleanup. These measures support sustained productivity.
Mistake 10: Rushing the Preparation Process
Haste in prep undermines the entire project, as paint amplifies any shortcuts taken during sanding.
Fix it: Allocate time for sanding within the schedule, treating it as integral. Sequence tasks: inspect, coarse sand, clean, fine sand, prime, sand again, then paint. Deliberate pacing produces polished, enduring results.
Essential Techniques for Optimal Sanding
Organize grits by labeling and stacking them sequentially to prevent mix-ups. Illuminate the surface with a flashlight to detect shadows indicating scratches or inconsistencies. Employ circular motions on flat expanses to minimize linear patterns. Patience fosters rhythm, leading to superior finishes.
Achieving Lasting Professional Results
A well-executed paint job reflects meticulous preparation, with smooth surfaces and uniform sheen stemming from thorough sanding. This applies whether refreshing cabinets, trim, or furniture. Integrating prep as a creative element ensures durable, high-quality outcomes within any timeframe.