Professional Painters' Preferred TSP Alternatives for Deglossing
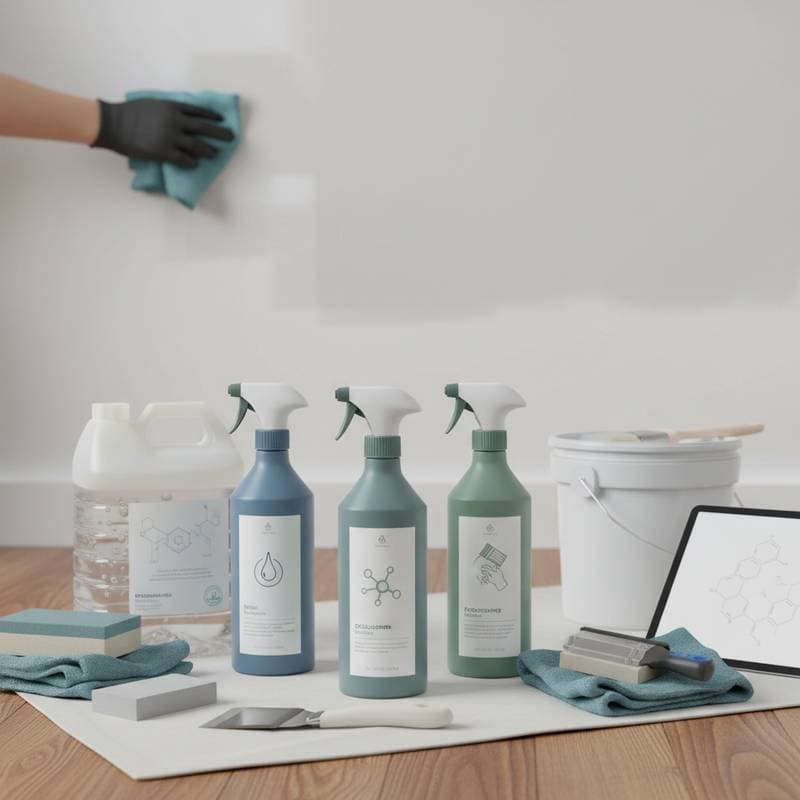
Proper surface preparation forms the cornerstone of any successful paint project. From refreshing kitchen cabinets to updating trim and walls, a thoroughly cleaned and dulled surface guarantees strong paint adhesion and a durable finish. For decades, trisodium phosphate, or TSP, served as the go-to heavy-duty cleaner and deglosser among painters. However, environmental regulations, potential residues, and interactions with contemporary paints have prompted professionals to adopt more reliable substitutes.
These modern alternatives deliver comparable cleaning power and deglossing action while minimizing health risks and ecological impact. This article examines the shift in professional practices, highlights key TSP replacements, and provides homeowners with insights into their benefits. Understanding these tools empowers you to make informed decisions when planning a painting project.
Project Cost Breakdown
Budgeting for surface preparation helps set realistic expectations for your paint job. Costs vary based on project scale, surface conditions, and chosen materials. Professionals factor in labor, products, and any additional treatments to ensure comprehensive prep.
Average Cost Ranges
- Basic surface prep: $0.15 to $0.30 per square foot, covering initial cleaning and light scuffing for low-gloss surfaces.
- Standard cleaning and deglossing: $0.35 to $0.60 per square foot, including application of specialized cleaners on moderately glossy areas.
- Premium prep with specialty cleaners: $0.65 to $1.00 per square foot, for challenging surfaces like high-gloss cabinets or previously varnished wood.
What's Included
Surface preparation typically encompasses several essential steps to ready the area for painting:
- Thorough cleaning to eliminate grease, dust, and everyday contaminants.
- Targeted application of deglossers to break down glossy finishes.
- Optional light sanding or scuffing to create a suitable texture for adhesion.
- Final wipe-down and drying to prepare for primer or topcoat application.
What Costs Extra
Certain conditions demand additional effort and resources:
- Mold or mildew treatment: $50 to $150 per room, involving specialized removers and ventilation.
- Intensive grease removal in kitchens or workshops: $0.25 to $0.40 per square foot added for repeated applications.
- Handling high-gloss or lacquered surfaces that require multiple deglossing passes: 20% to 30% increase in labor charges.
Factors That Affect Final Cost
| Factor | Cost Impact | Examples |
|---|---|---|
| Surface type | Moderate | Cabinets and trim demand finer attention than flat walls. |
| Product choice | Variable | Solvent-based options incur higher material fees than water-based ones. |
| Labor time | High | Additional dwell times or rinsing steps extend overall project duration. |
| Local regulations | Low to moderate | Stricter chemical rules in some regions raise the price of compliant products. |
By discussing these elements upfront with your painter, you can tailor the prep to your budget while maintaining quality.
Choosing the Right Product for the Job
The ideal TSP replacement hinges on several variables, including the substrate material, current finish level, and intended paint type. For instance, applying latex paint over aged glossy enamel calls for a robust deglosser to ensure bonding, whereas refreshing matte walls might only need mild cleaning.
Professionals recommend patch-testing products on inconspicuous areas to verify results and avoid damage. Certain formulas offer subtle dulling ideal for use with high-bond primers, while others aggressively tackle tough varnishes on laminates or metals. Prioritize these attributes when evaluating options:
- Residue-free compositions that enhance rather than hinder paint grip.
- Low-odor, low-VOC variants suitable for enclosed indoor spaces.
- No-rinse designs that streamline the workflow and reduce water usage.
- Broad compatibility across wood, metal, and synthetic surfaces.
Water-based deglossers often suit everyday residential projects for their ease and safety, whereas solvent-based ones excel in industrial or heavily soiled environments. Selecting appropriately not only boosts efficiency but also aligns with sustainable practices.
Step-by-Step Process for Preparation and Application
Executing surface prep methodically yields professional outcomes. Follow this sequence to mimic expert techniques, whether delegating to a crew or handling minor tasks yourself.
-
Clean the surface thoroughly. Start by sweeping away dust, cobwebs, and loose particles with a soft brush or vacuum. For stubborn dirt, use a mild detergent solution to pre-wash without introducing new residues.
-
Apply the deglosser or cleaner evenly. Select a lint-free cloth, non-abrasive sponge, or fine-mist sprayer based on the surface's texture and size. Work in small sections to maintain control and avoid streaking.
-
Observe the dwell time specified on the product label. This pause, typically 5 to 15 minutes, enables the formula to penetrate and dull the gloss effectively. Monitor for color changes or bubbling as indicators of progress.
-
Wipe or rinse as directed. No-rinse products simplify this by requiring only a damp cloth pass, while others necessitate a clean water flush to neutralize chemicals.
-
Allow complete drying. Wait at least 30 minutes to an hour, depending on humidity, ensuring the surface feels tack-free before proceeding to priming or painting.
For detailed areas like cabinet doors or window frames, professionals integrate cleaning and deglossing into a single pass using multi-purpose formulas. This approach minimizes handling and preserves surface integrity. Always protect adjacent areas with drop cloths to prevent unintended exposure.
Safety and Environmental Considerations
While TSP alternatives pose fewer risks than their predecessor, vigilance remains essential. Equip yourself with nitrile gloves, safety goggles, and adequate ventilation to mitigate skin irritation or fume inhalation. Test products on sealed surfaces only, as unsealed porous materials like raw wood may absorb liquids unevenly.
Phosphate-free and biodegradable options curb waterway pollution and comply with tightening environmental standards. Many painting firms adopt these for their reduced volatile organic compounds, fostering healthier workspaces and neighborhoods. Consult product safety data sheets for disposal guidelines, and never pour residues down drains.
Addressing Common Preparation Challenges
Inadequate deglossing frequently undermines paint longevity. Without dulling glossy surfaces, new coats fail to adhere, resulting in peeling, chipping, or a bumpy texture over time. These issues manifest quickly in high-traffic zones like hallways or kitchens.
Other pitfalls include residue buildup from incomplete rinsing, which attracts dirt post-painting, or over-aggressive application that etches the substrate. To sidestep these, professionals emphasize testing and measured use. Proper prep not only averts callbacks but also enhances the overall aesthetic and durability of your space.
Optimizing Your Painting Project
Investing in quality surface preparation pays dividends in a flawless, long-lasting finish. This often-overlooked phase influences everything from color vibrancy to resistance against wear. By opting for proven deglossers, you streamline the process, cut down on rework, and align with eco-conscious standards.
Homeowners benefit from collaborating closely with painters on product selections and timelines. This partnership ensures tailored solutions that match your home's needs. Ultimately, mastering these fundamentals elevates any DIY effort or professional hire to superior results.


